🖥️⚙️ Azure VM Provisioning & Web Server Setup: Linux Nginx and Windows IIS Deployment

This guide outlines a practical, hands-on task involving the provisioning and configuration of Azure Virtual Machines to host two of the most popular web servers in use today. This is a foundational skill for anyone looking to work with cloud infrastructure.
What We’ll Be Doing
We’ll be setting up two distinct environments to get a feel for managing different server types in the cloud:
-
Linux VM with Nginx: We’ll provision a Linux-based virtual machine and configure it to run Nginx. Nginx is a lightweight, high-performance web server that is widely used for static sites, reverse proxies, and scalable microservices. You’ll learn how to set up and manage a Linux server from scratch.
-
Windows VM with IIS: We’ll provision a Windows-based virtual machine and configure it to run IIS (Internet Information Services). As Microsoft’s integrated web server, IIS is the go-to choice for hosting .NET applications, enterprise-level solutions, and internal portals. This will give you experience with the Windows Server ecosystem.
Why This Matters for Your Career
Engaging in this task provides a wealth of benefits that directly translate to your career and skill set:
-
Hands-on Mastery: You’ll gain practical experience with VM provisioning, a core skill for any cloud professional. We’ll walk through the process using both the Azure Portal (for a visual approach) and the Azure CLI (for automation and scripting practice).
-
Cross-Platform Expertise: Get comfortable working with both Linux and Windows server environments. In today’s diverse tech landscape, being proficient in both is a huge advantage, making you a more versatile and valuable asset to any team.
-
Understanding Cloud Concepts: You’ll solidify your understanding of fundamental cloud concepts like networking, security groups, public IPs, and remote access—all in a real-world context.
🚀 Ready to dive in? Let’s get started!
🧱 Task 1: Installing IIS on an Azure Windows VM
First, log on to the Azure Portal.

Before we create our VM, we’ll start by creating a dedicated Resource Group. This is a logical container that holds related resources for an Azure solution. Using a Resource Group helps with organization, cost management, and lifecycle management of your services.
Create a Resource Group
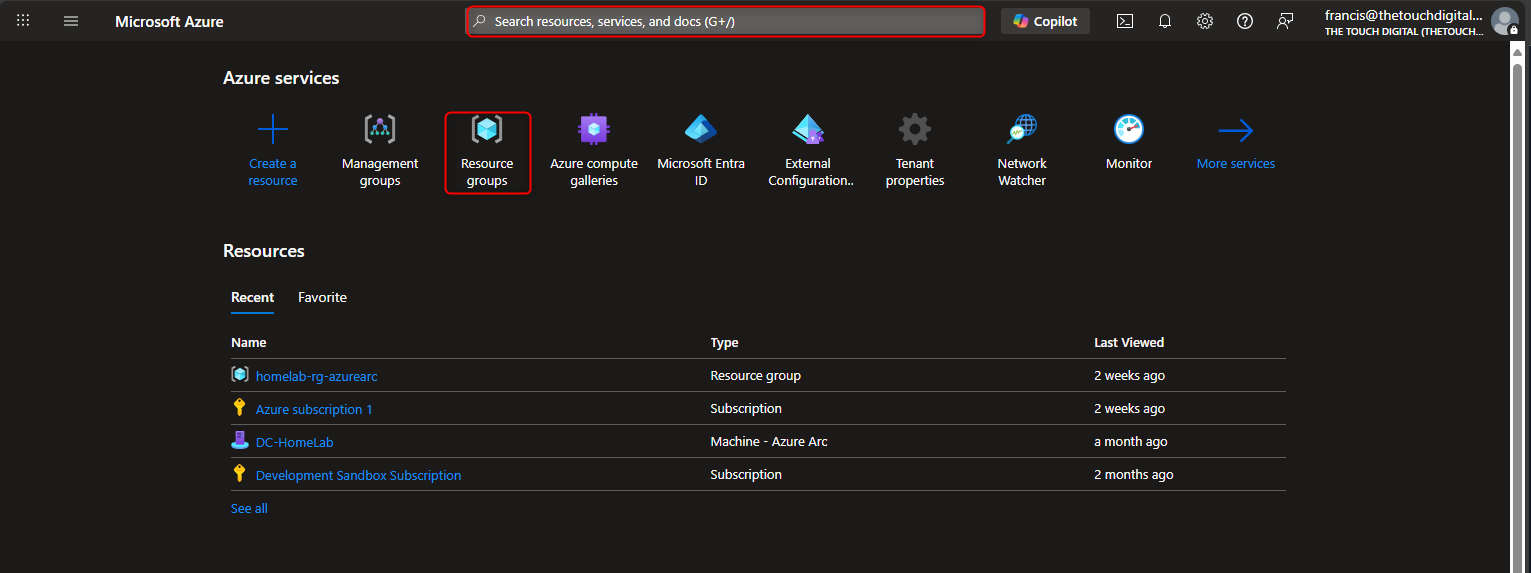
In the Azure Portal search bar, type Resource Group and select it from the results.
- Click + Create to get started.

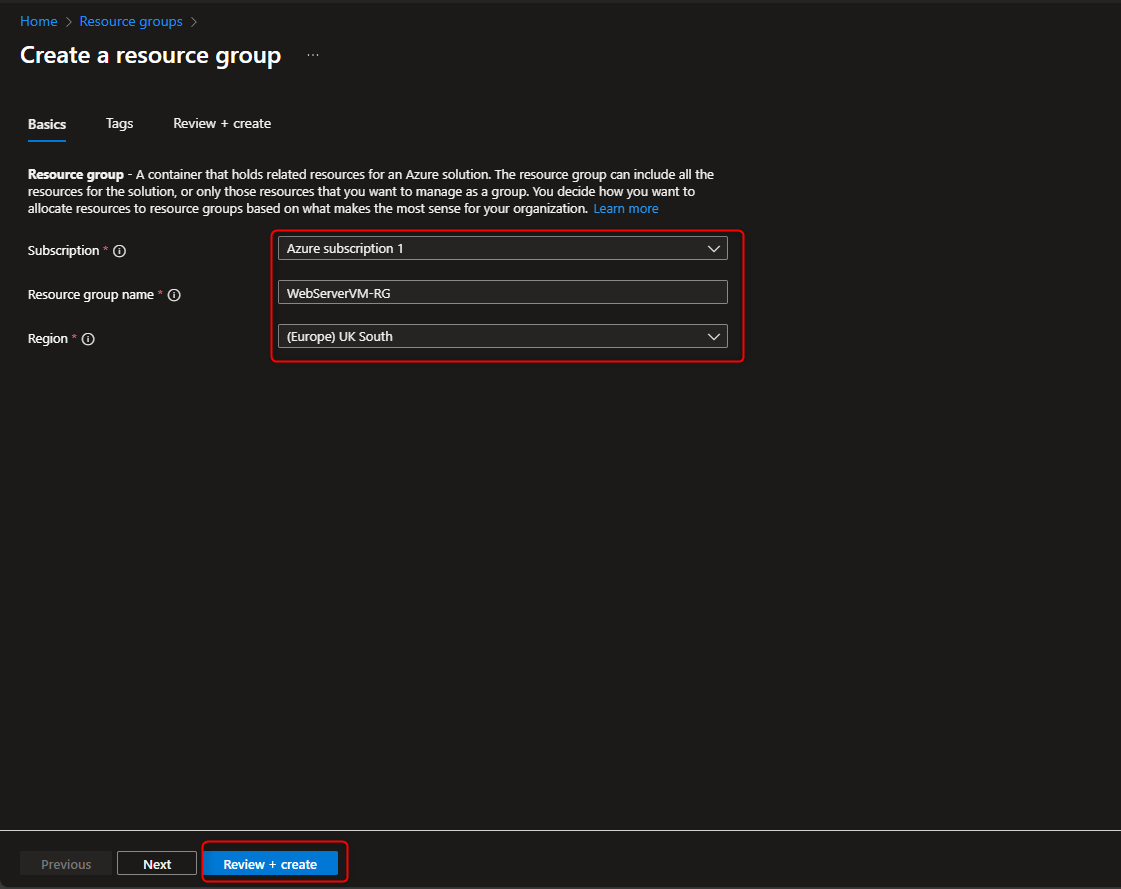
- Subscription: Select your Azure subscription.
- Resource group name: Enter a descriptive name like WebServer-RG.
- Region: Choose a region where you want your resources to be deployed. For this demonstration, we’ll use UK South
- Click Review + Create, then Create. Your new resource group will be ready in a few moments.

Create the Windows Virtual Machine
Now that our resource group is ready, let’s create the Windows VM within it.
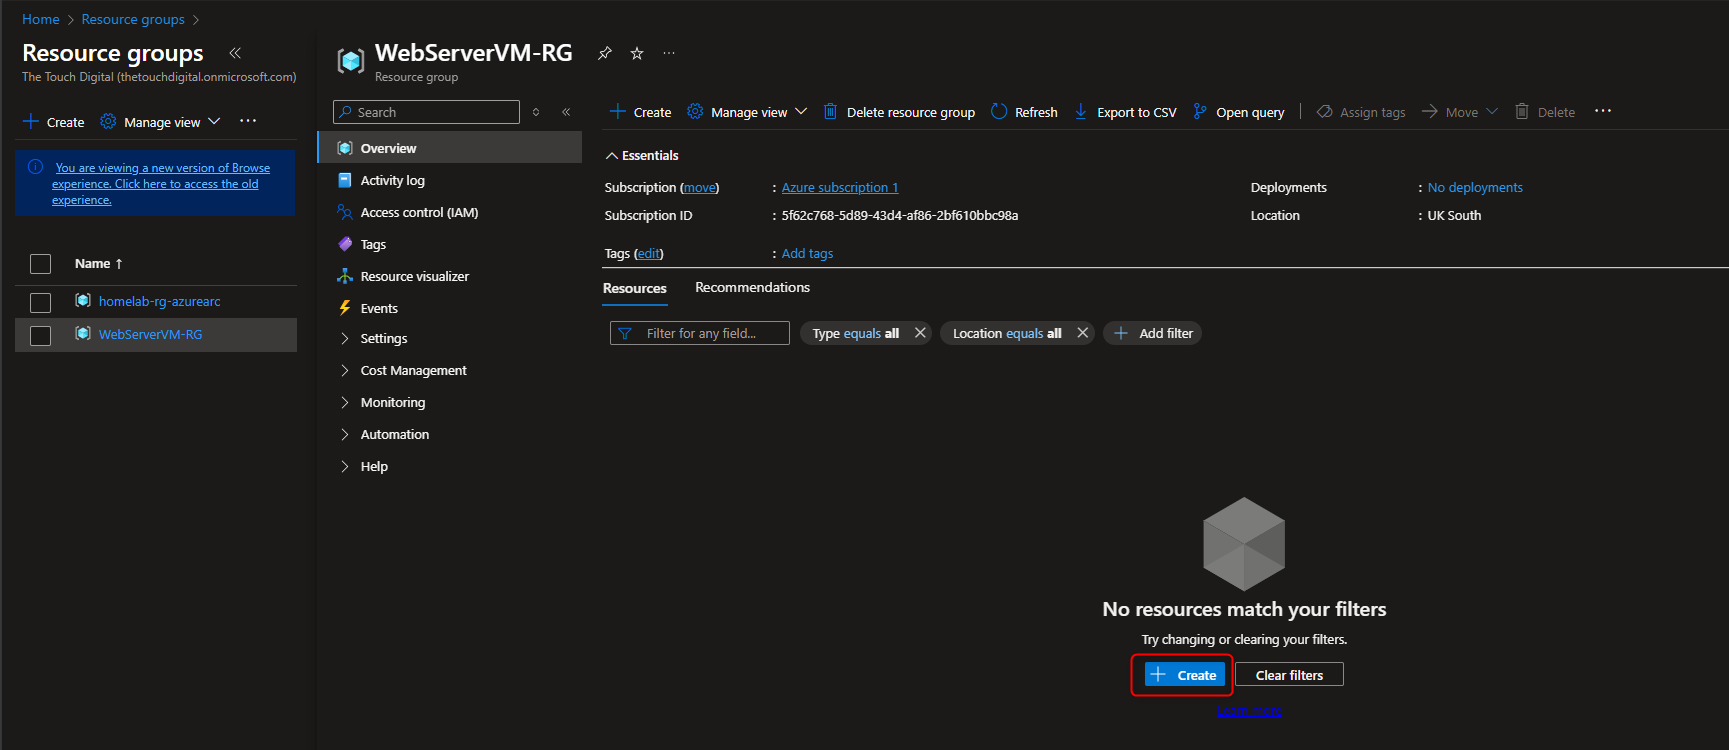
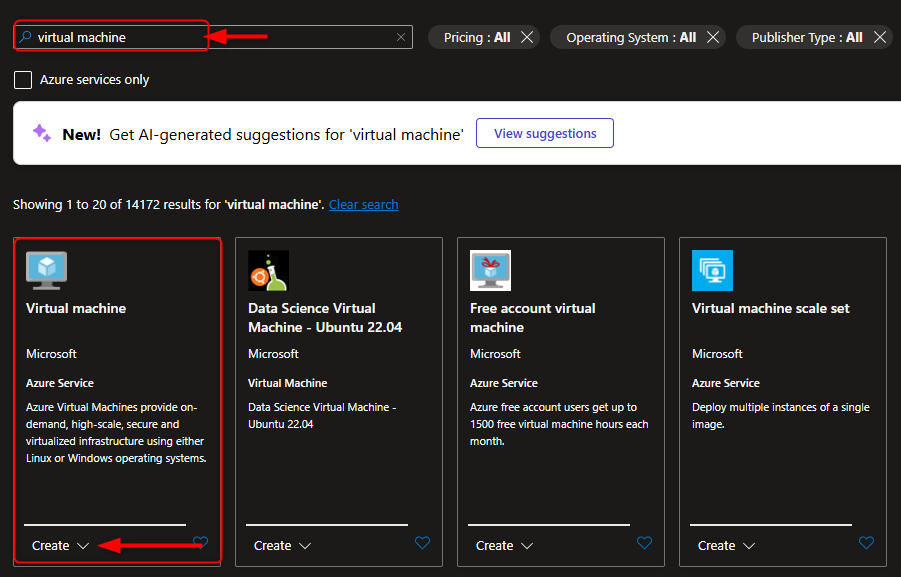
- Select Create within the WebServer-RG , then type Virtual Machine and select + Create > Azure Virtual Machine.
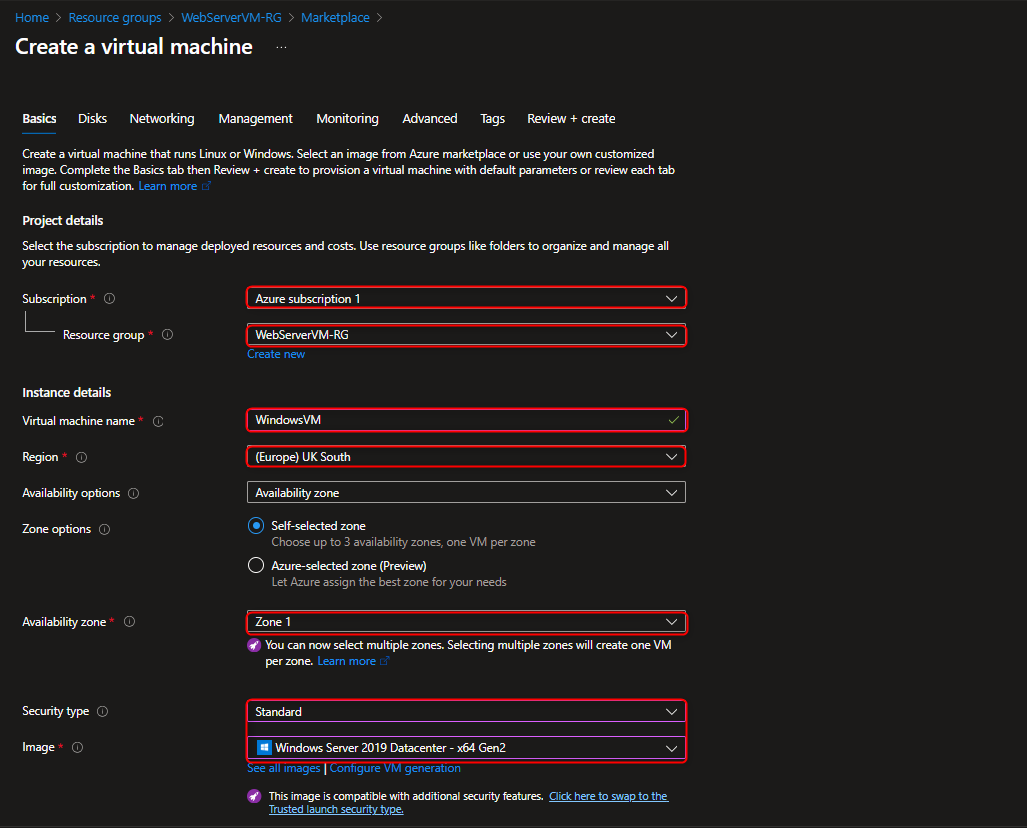
- Fill out the required parameters:
- Resource group: Select the WebServer-RG we just created.
- Virtual machine name: Name your VM, for example, WindowsVM.
- Region: This should be the same as your resource group’s region (UK South).
- Image: Choose a suitable Windows Server image.
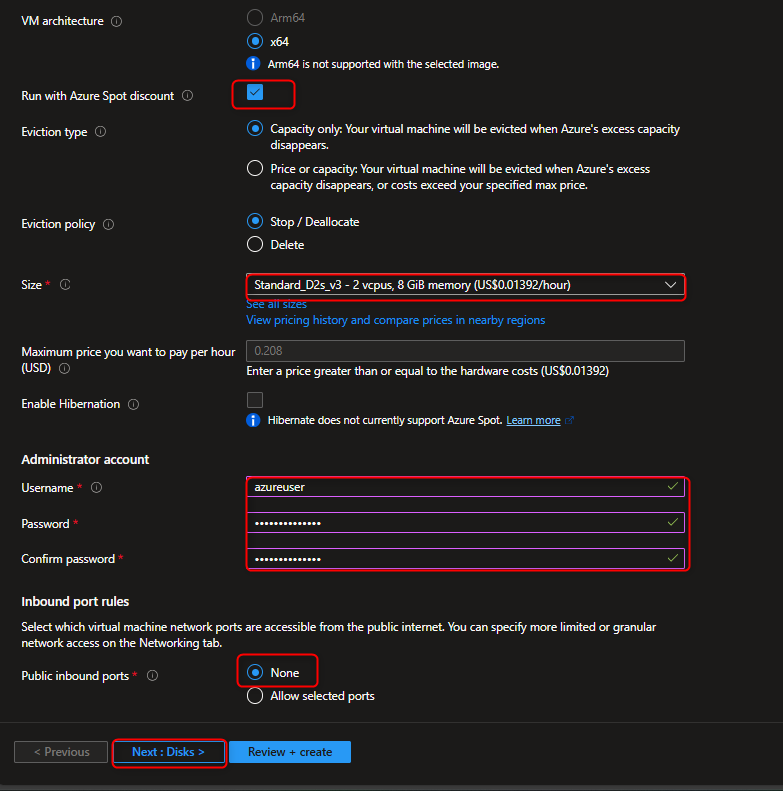
- Size: Select a VM size.
- Administrator account: Create a username and password for your VM.
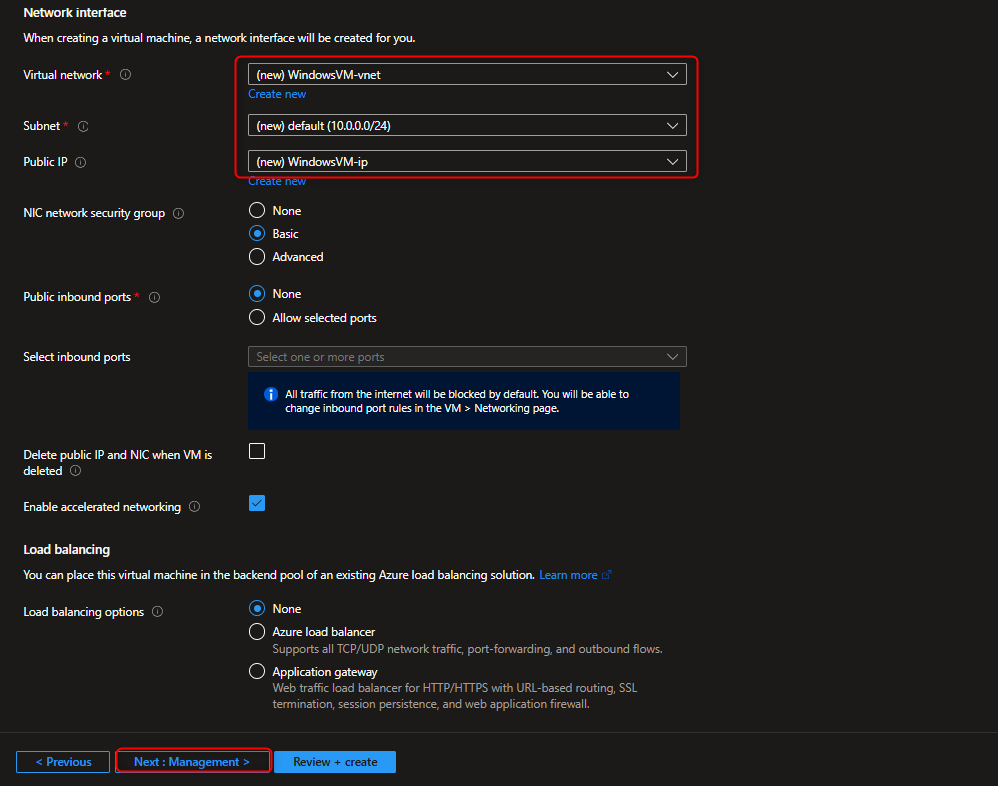
- ** Set Inbound Traffic to None, as We will configure Network Security Group NSG separately.
💰 Cost-Saving Tip: For this demonstration, you can select the Azure Spot Discount option to get a lower rate. Keep in mind that Spot VMs can be evicted if Azure needs the capacity, so they are not recommended for production workloads.
Configure Disks, Management & Tags
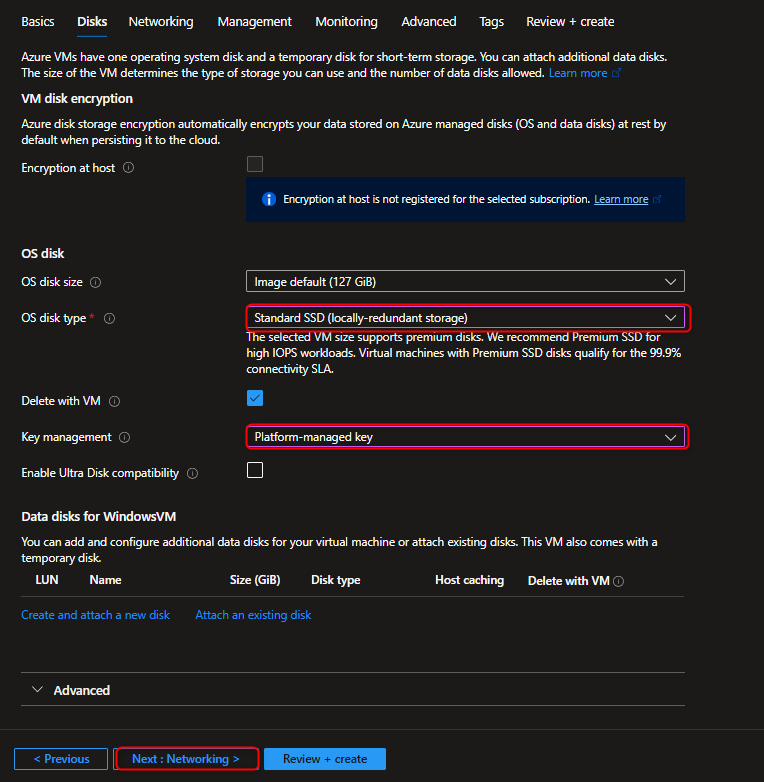
- Disks: For this guide, we’ll use the default OS disk. We’ll add a separate data disk later for best practice.
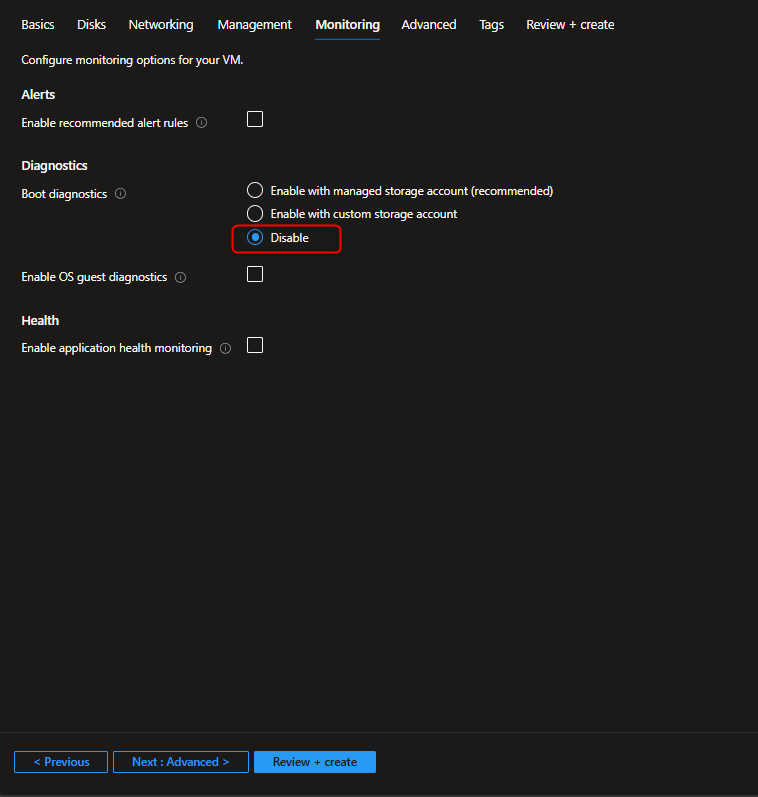
- Management: Disable Boot diagnostics under the
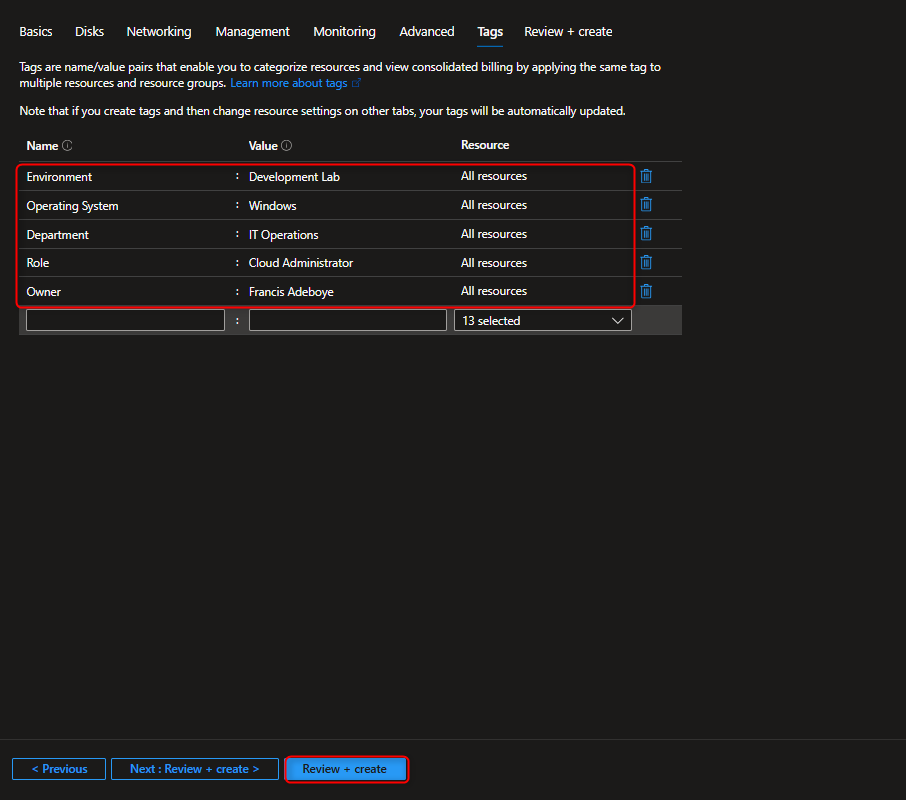
Monitoringtab for more control and privacy over your data. - Tags: Use tags for better resource management. Tags are key-value pairs that help with cost management and categorization. For example: - Key: Department - Value: IT - Key: Project - Value: WebServerDemo
Finalize and Create the VM
After reviewing all the settings, click Review + create. Once the validation passes, click Create. The deployment will take a few minutes.
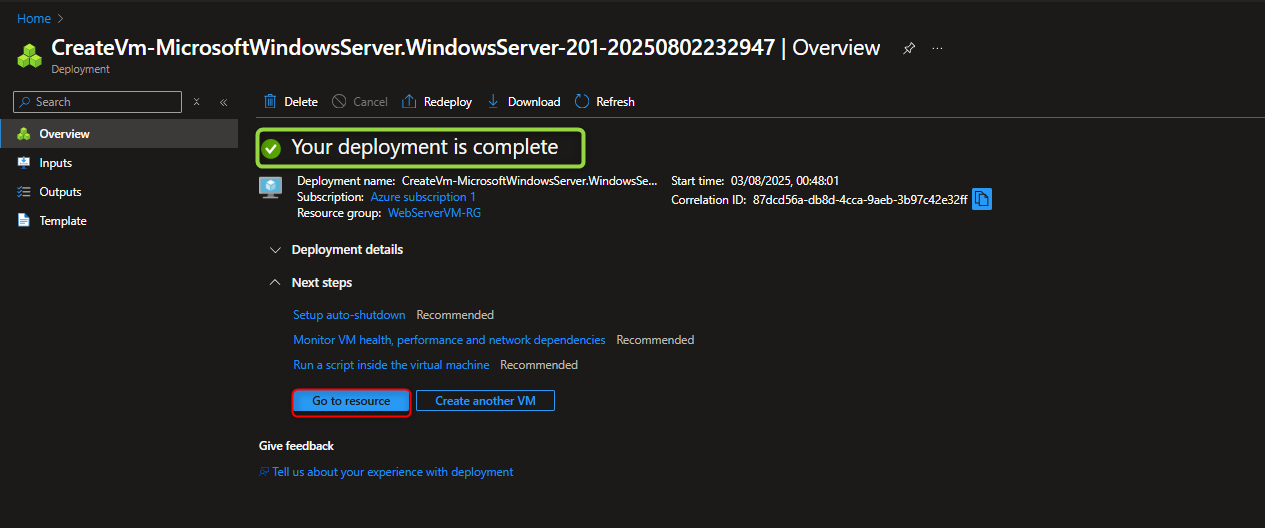
Attach and Initialize a Data Disk
Although the OS disk is ready, it’s a best practice to keep your web content on a separate Data disk. This makes it easier to manage backups and resize storage independently.
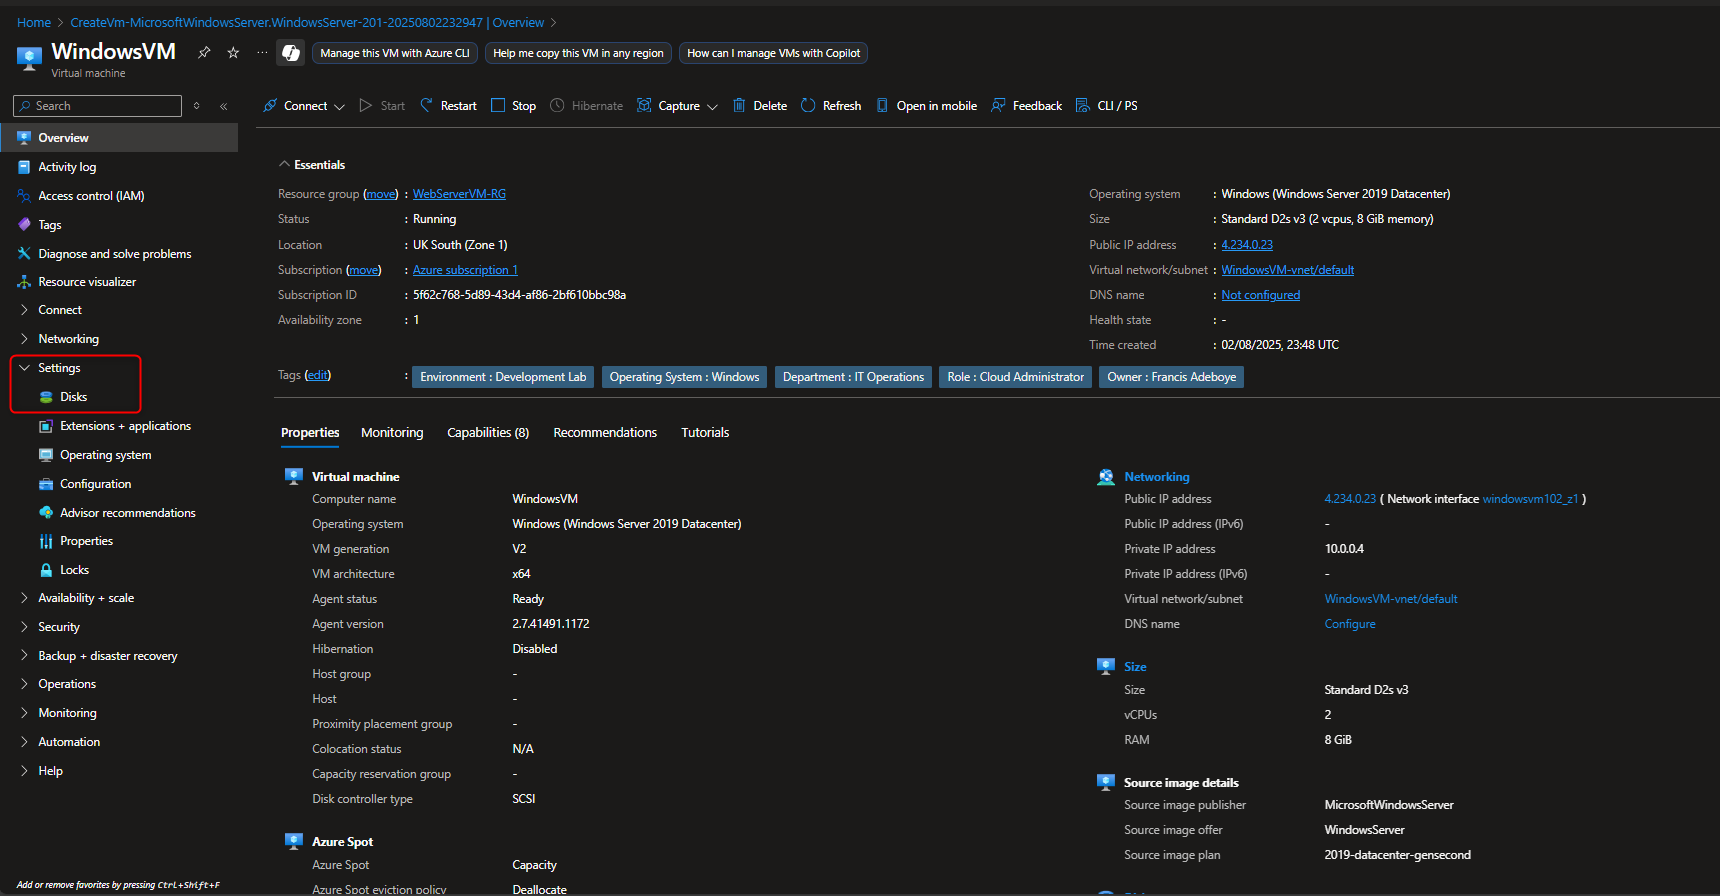
- Navigate to your new VM’s resource page.
- Under Settings, go to Disks.
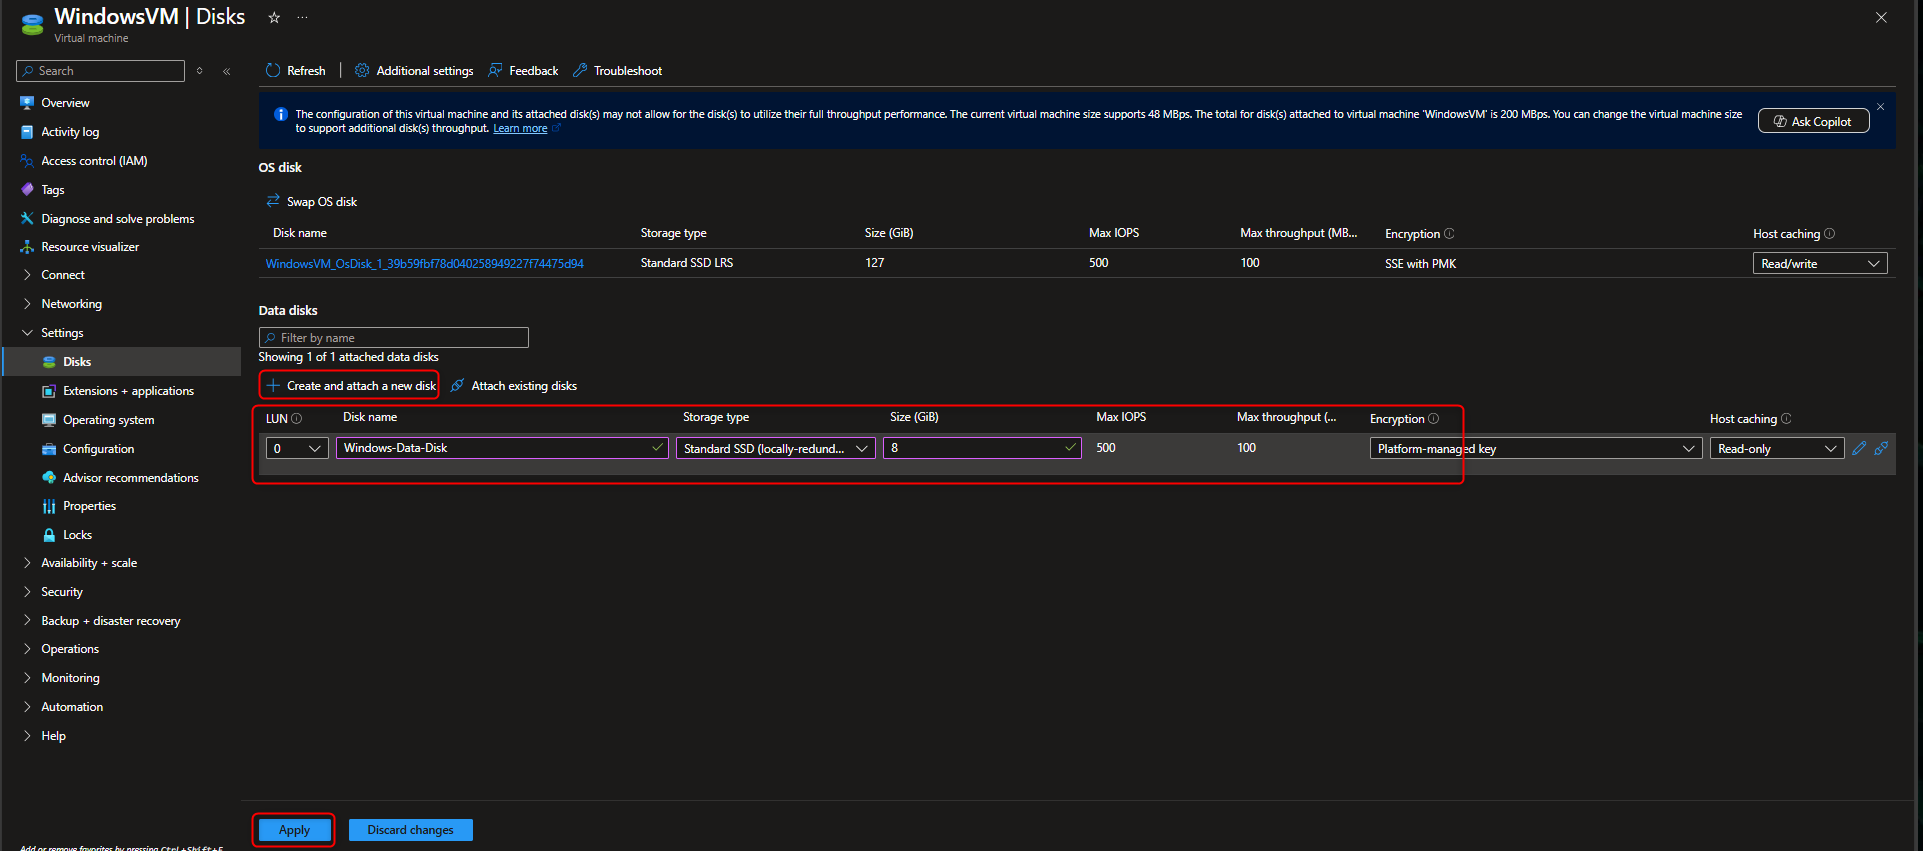
- Click + Create and attach a new disk.
- Choose a size and type for your new disk, then click OK.
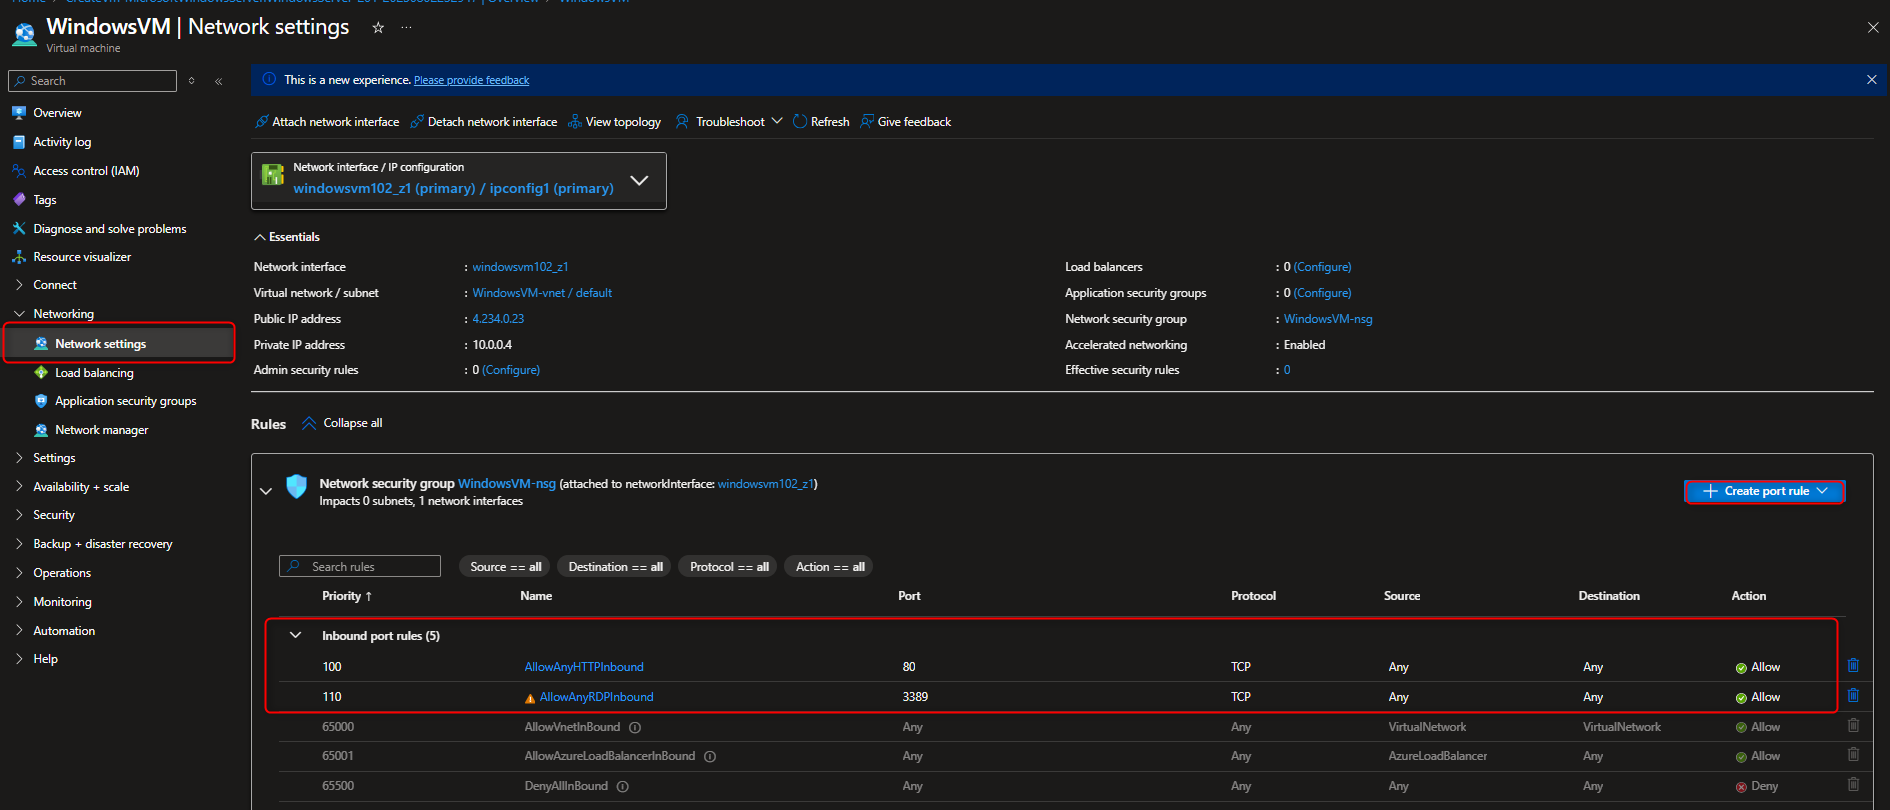
Create Network Security Group NSG to allow Inbound Traffic
- Networking: We will configure inbound ports to allow RDP (port 3389) for remote access and HTTP (port 80) for web traffic.
Connect to the VM and Prepare the Disk
Now it’s time to connect to the VM using RDP to finalize the setup.
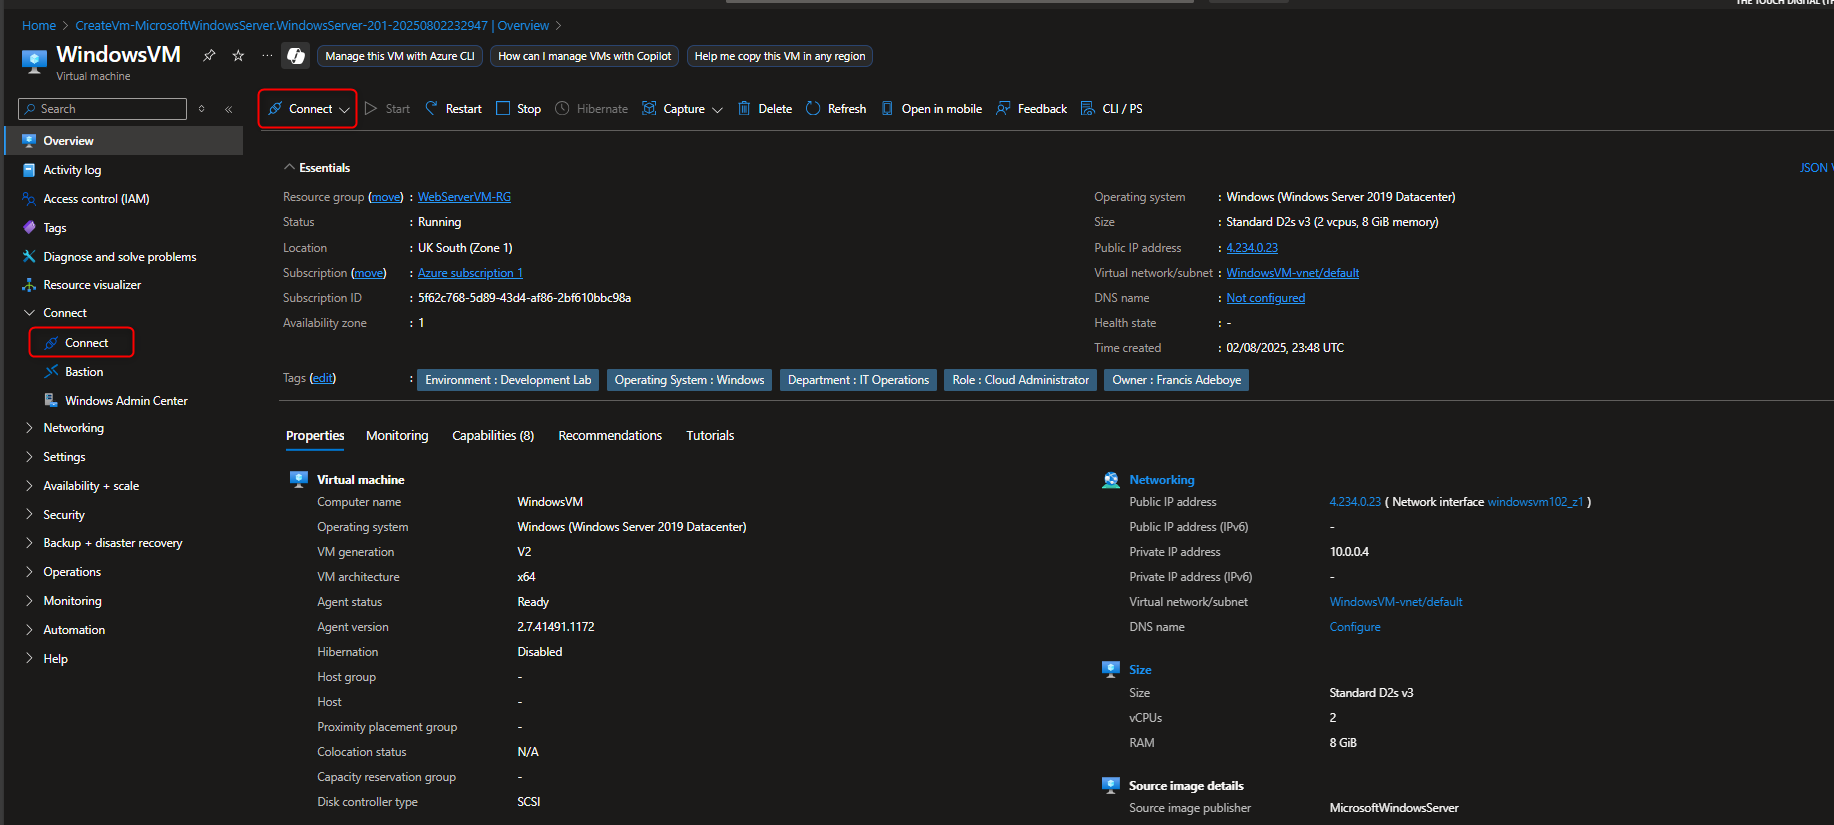
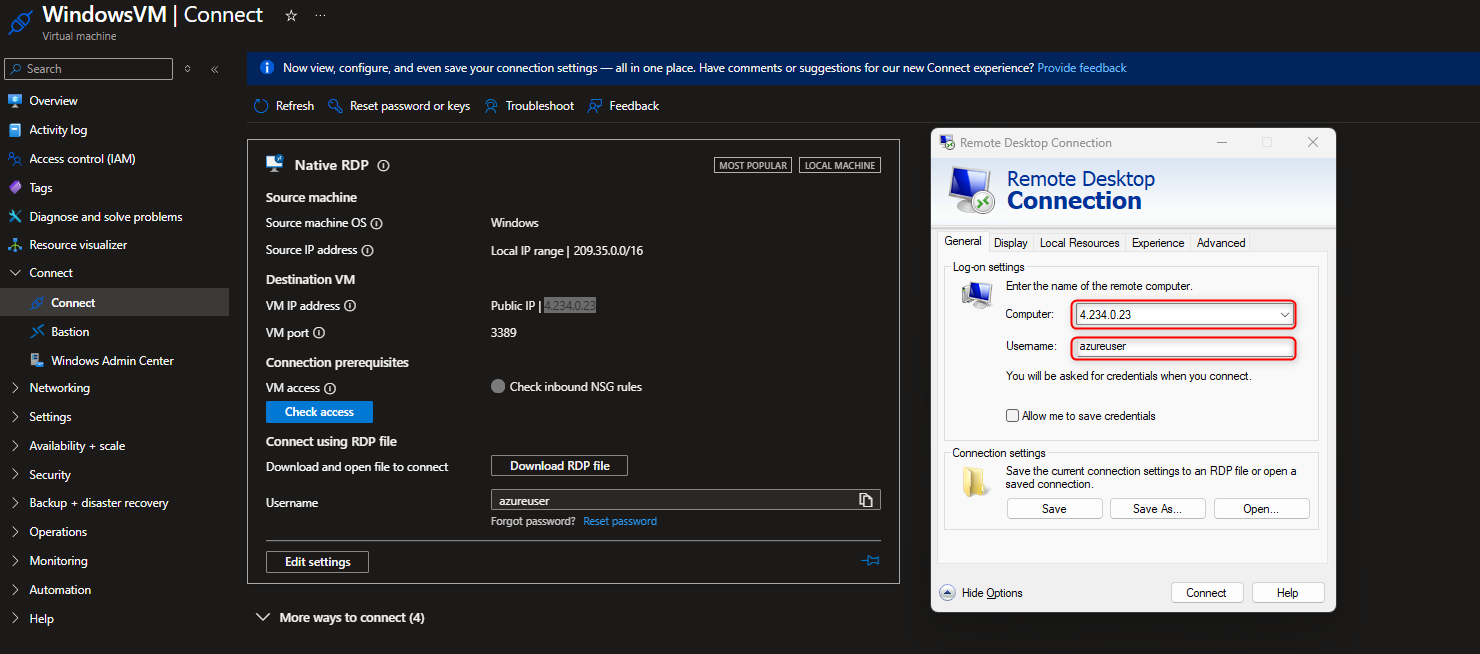
- On the VM’s overview page, click Connect > RDP.
- Search for Remote Desktop on Local Machine and connect to WindowsVM using the administrator credentials you created earlier.
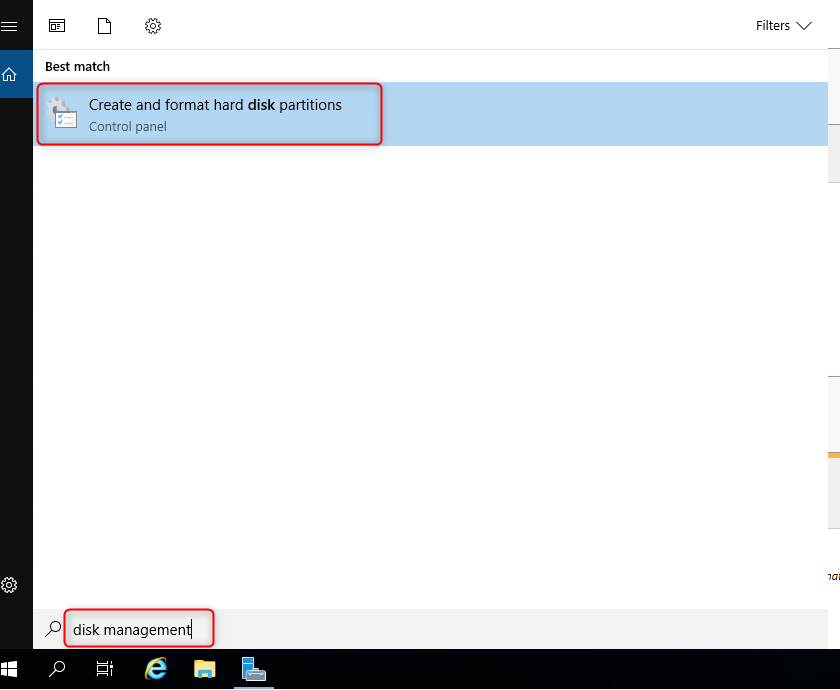
- Inside the VM, search for Disk Management in the Start menu.
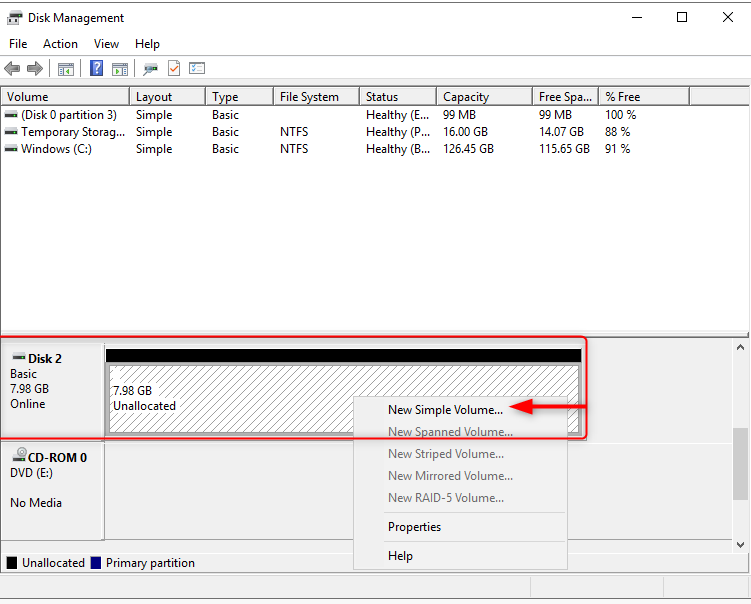
- You’ll see the new disk you just attached. It will be marked as “Not Initialized.”
- Right-click the disk and select Initialize Disk.
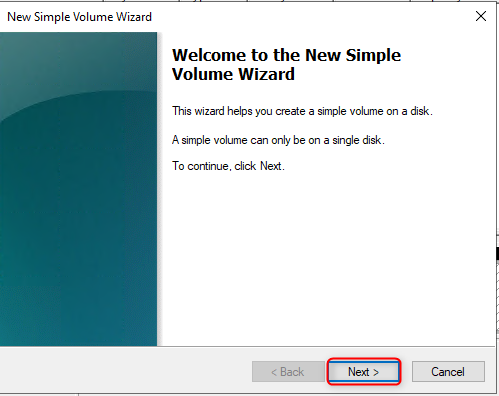
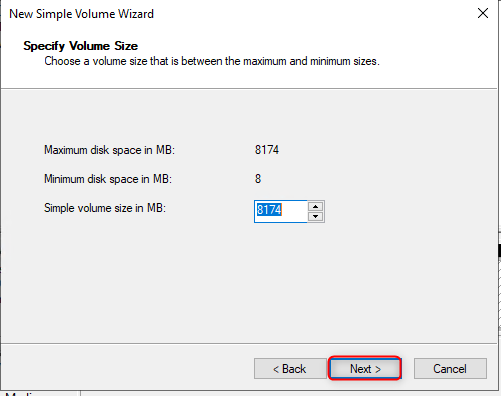
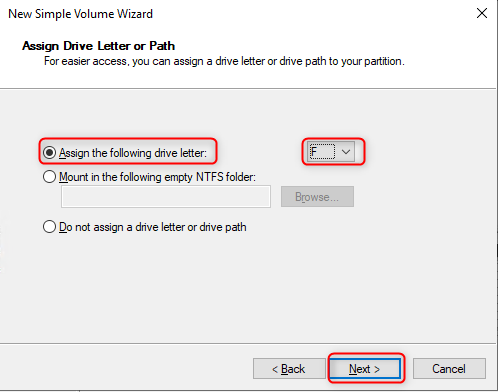
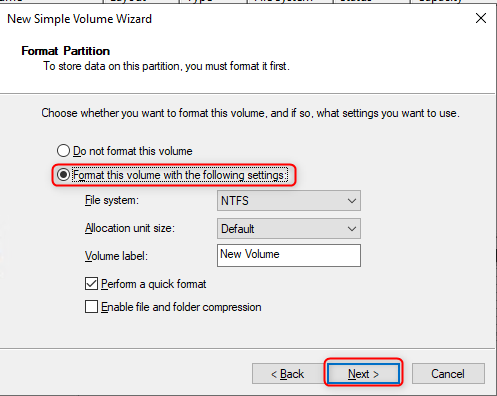
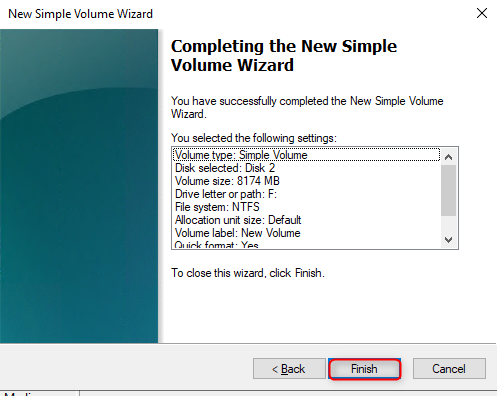
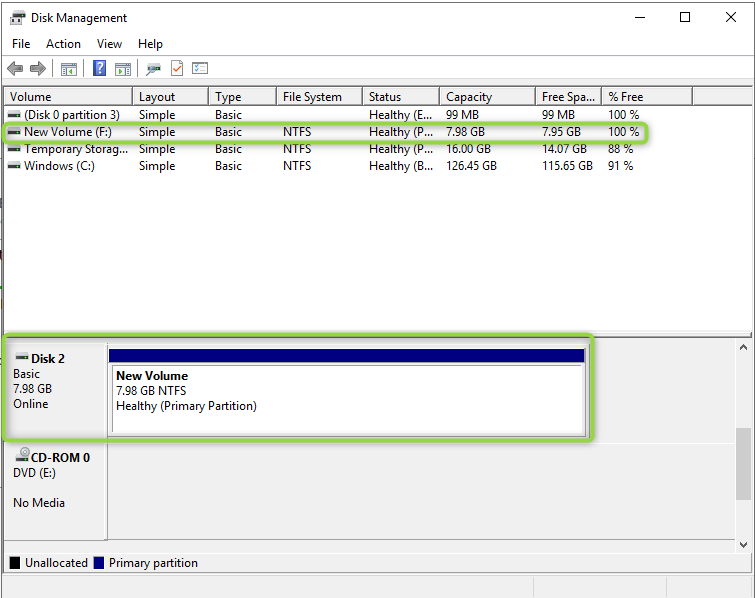
- Right-click on the unallocated space and select New Simple Volume. Follow the wizard to format the disk and assign it a drive letter.


Install and Verify IIS
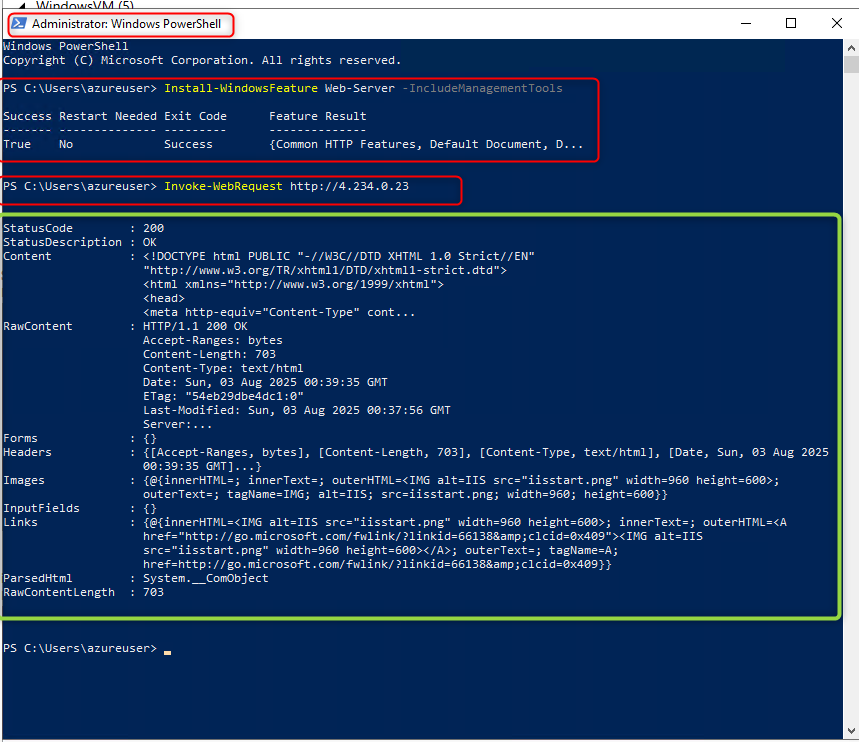
With the VM ready, let’s install IIS. The easiest way is with PowerShell.
- Launch PowerShell as an Administrator.
- Run the following command to install the web server role and its management tools:
|
|
- Verify Webserver is running via Power Shell
|
|
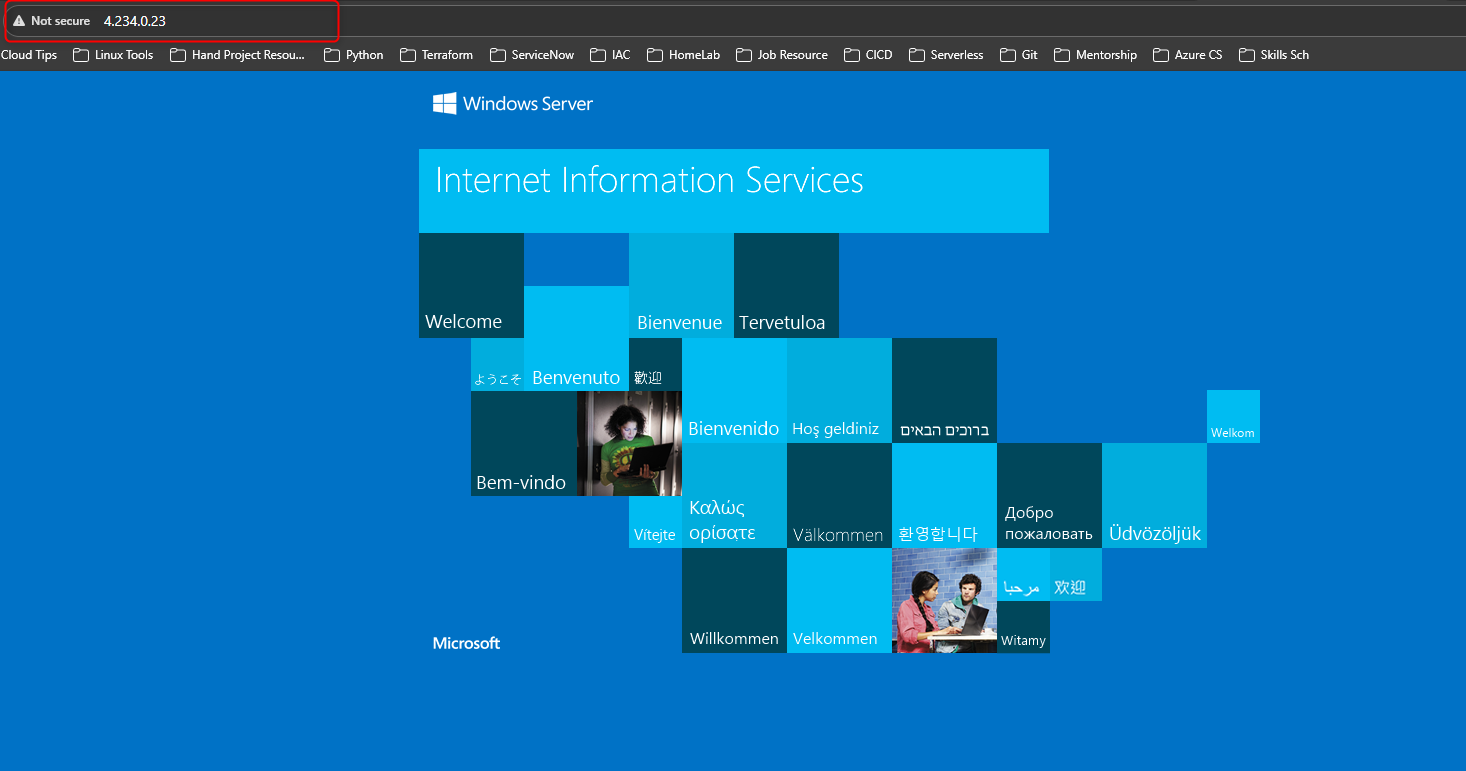
Once the installation is complete, you can verify it’s running from your browser.
- Find the VM’s public IP address in the Azure Portal.
- Open a new browser tab and navigate to
http://<your-vm-public-ip-address>.
You should see the default IIS welcome page! This confirms your web server is up and running.
🪟 Task 2: Deploying a Web Server (NGINX) on Azure Linux VM via CLI
In this section, we’ll provision an Ubuntu Linux VM using Azure CLI and configure it as a web server by installing Nginx.
Purpose: To demonstrate automated resource provisioning using Azure CLI and highlight its contrast with GUI-based deployment via the portal. This method offers transparency, repeatability, and control—skills essential for FinOps, DevOps, and security workflows.
While this guide uses Azure CLI, alternative Infrastructure as Code (IaC) approaches like PowerShell, ARM templates, Bicep, and Terraform can be used based on team preferences, project scale, and governance requirements.
Prerequisites:
- Azure CLI installed on your local machine: You can follow the official Azure CLI installation guide to get it installed.
Log on to Azure portal via CLI
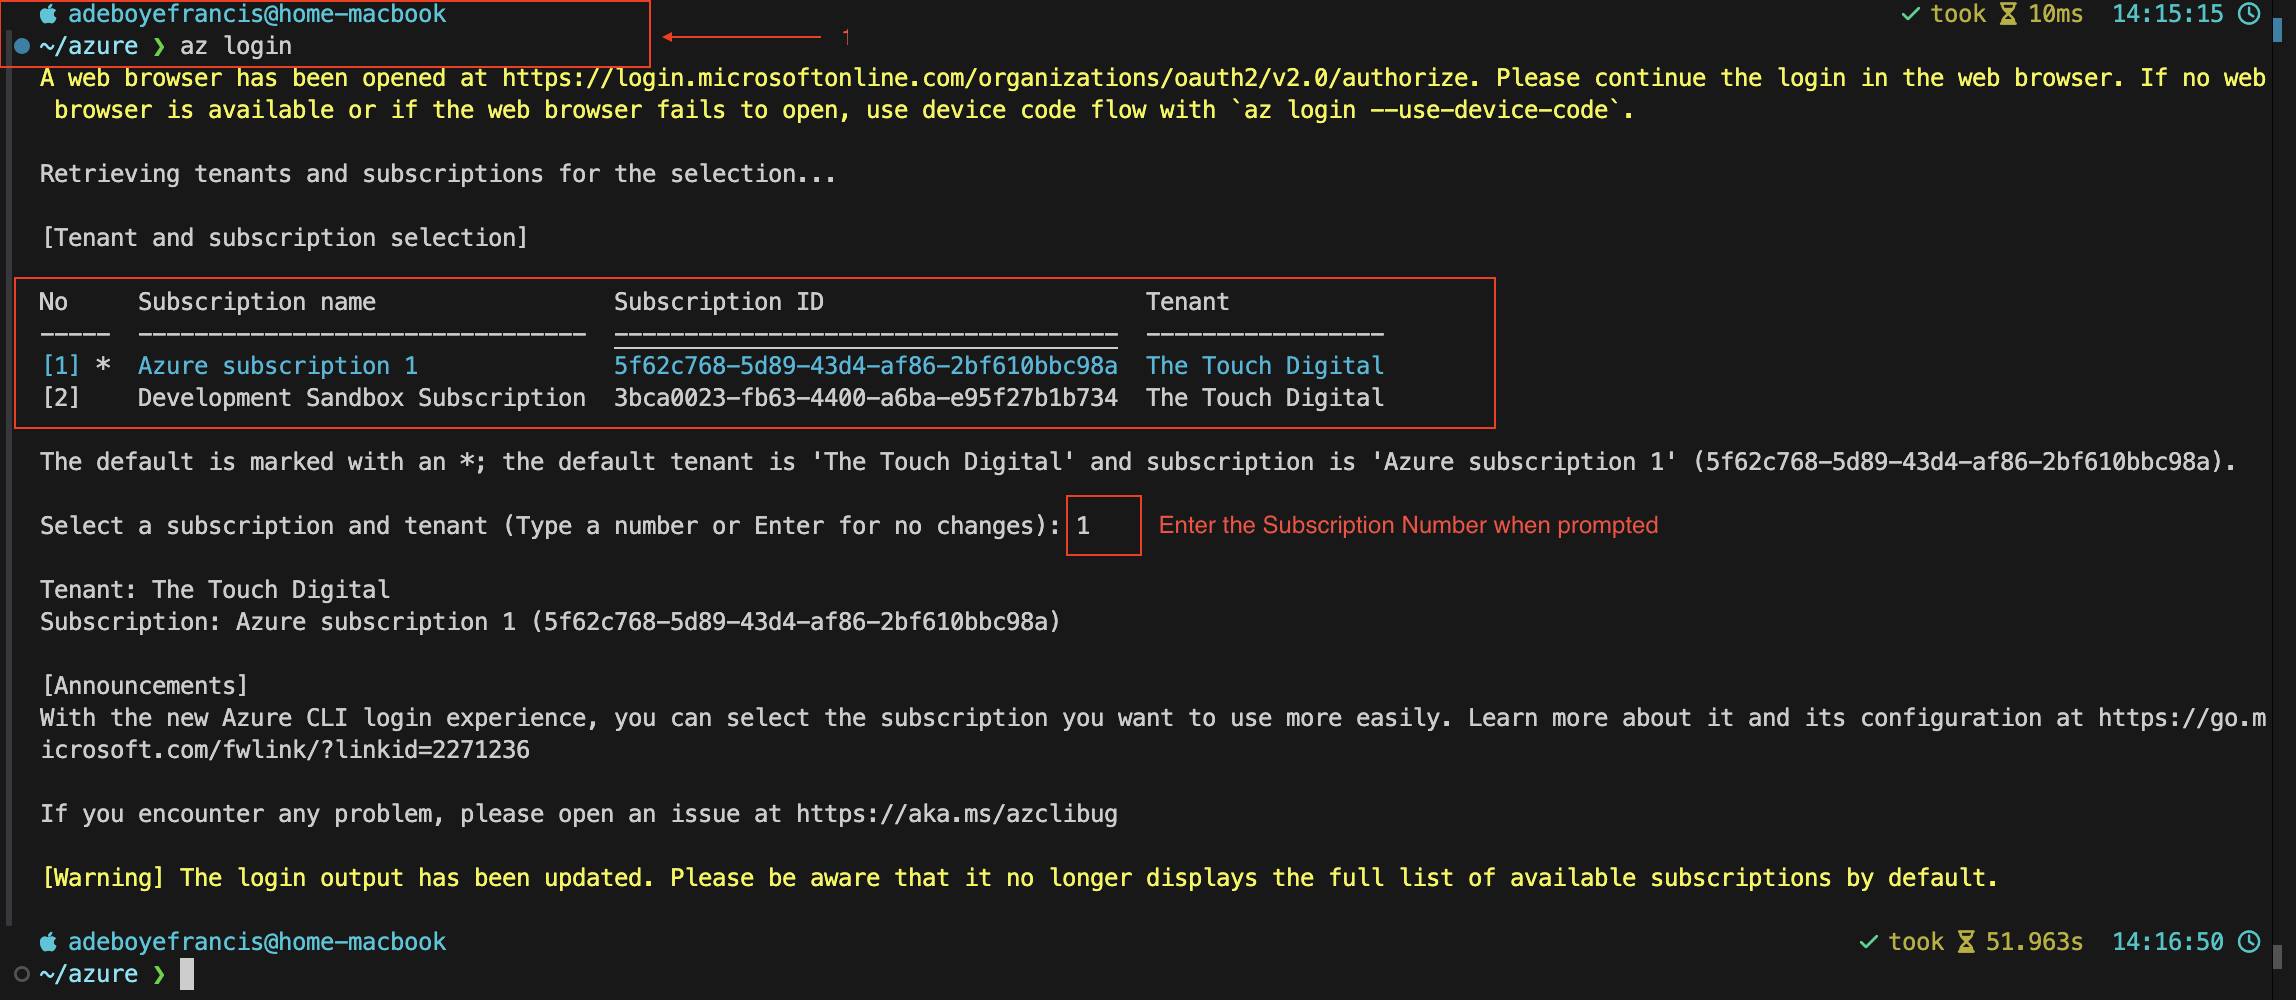
- Launch Terminal or VSCode run
az loginto connect Azure Portal - Select the Subscription number to be used for the deployment
- This will prompt microsoft authentication in the browser
- Fill in your azure portal credentials to complete log in process
Create or Use Existing Resource Group
In the previous task, We created a Resource Group named WebServer-RG which I will be using for the rest of this demonstration.
- List out existing Resource Group in Azure Account
az group list --output table

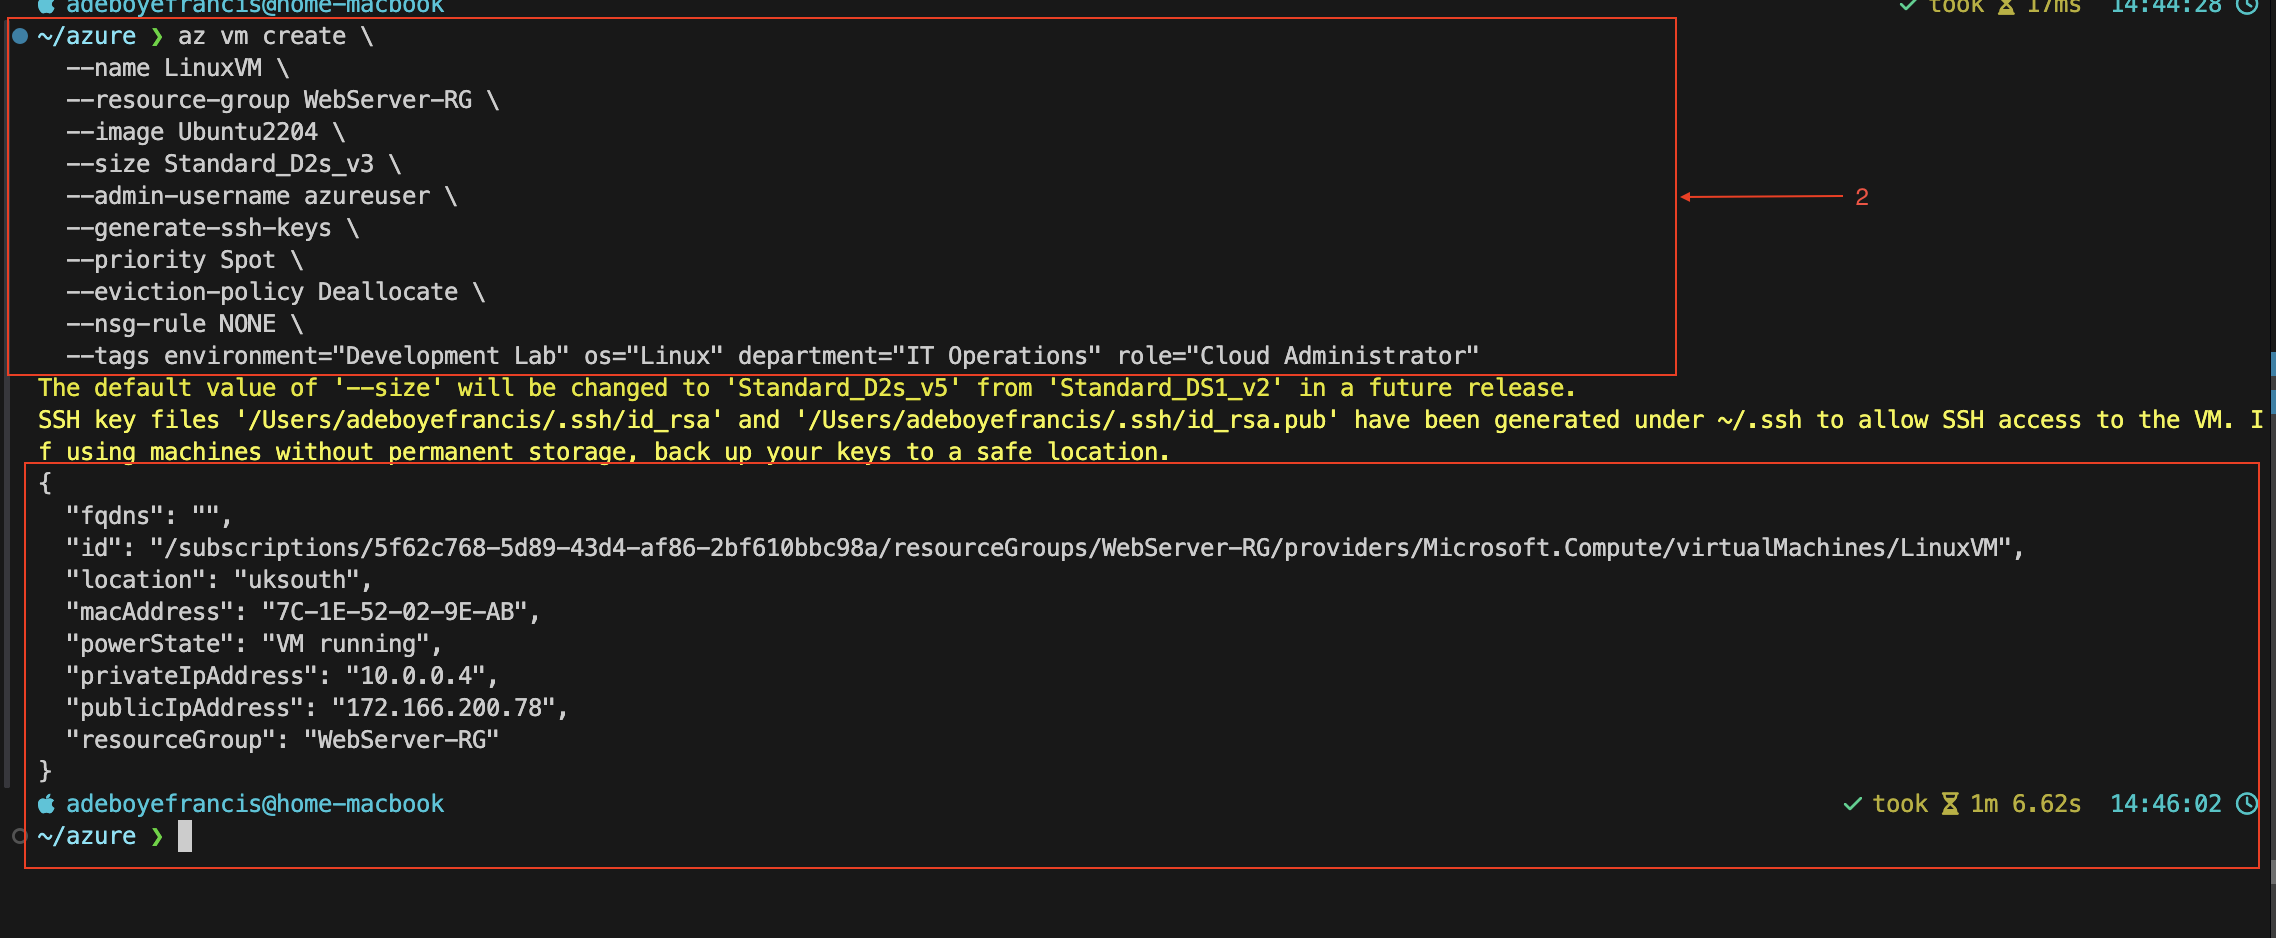
Deploy Azure Linux Virtual Machine (Ubuntu)
✅ Tip: –nsg-rule NONE avoids exposing inbound ports.
|
|
|
|
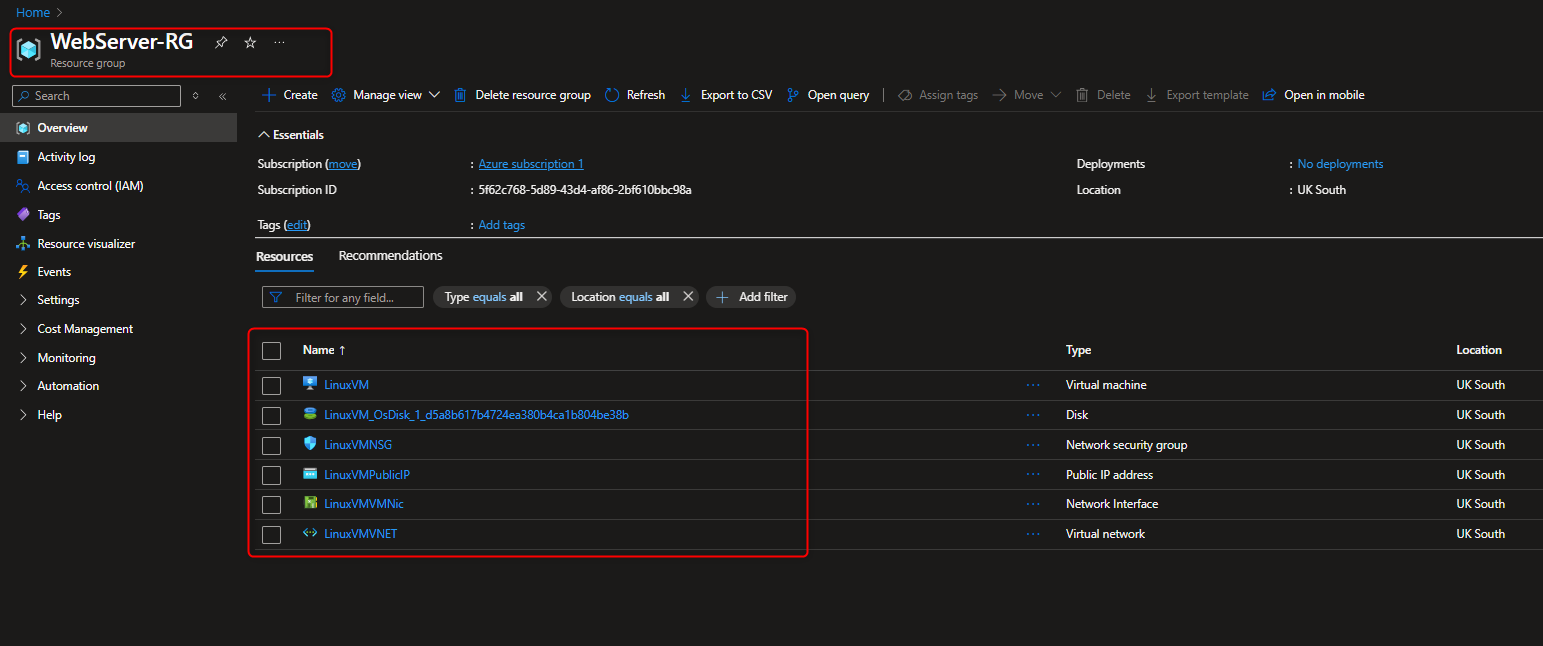
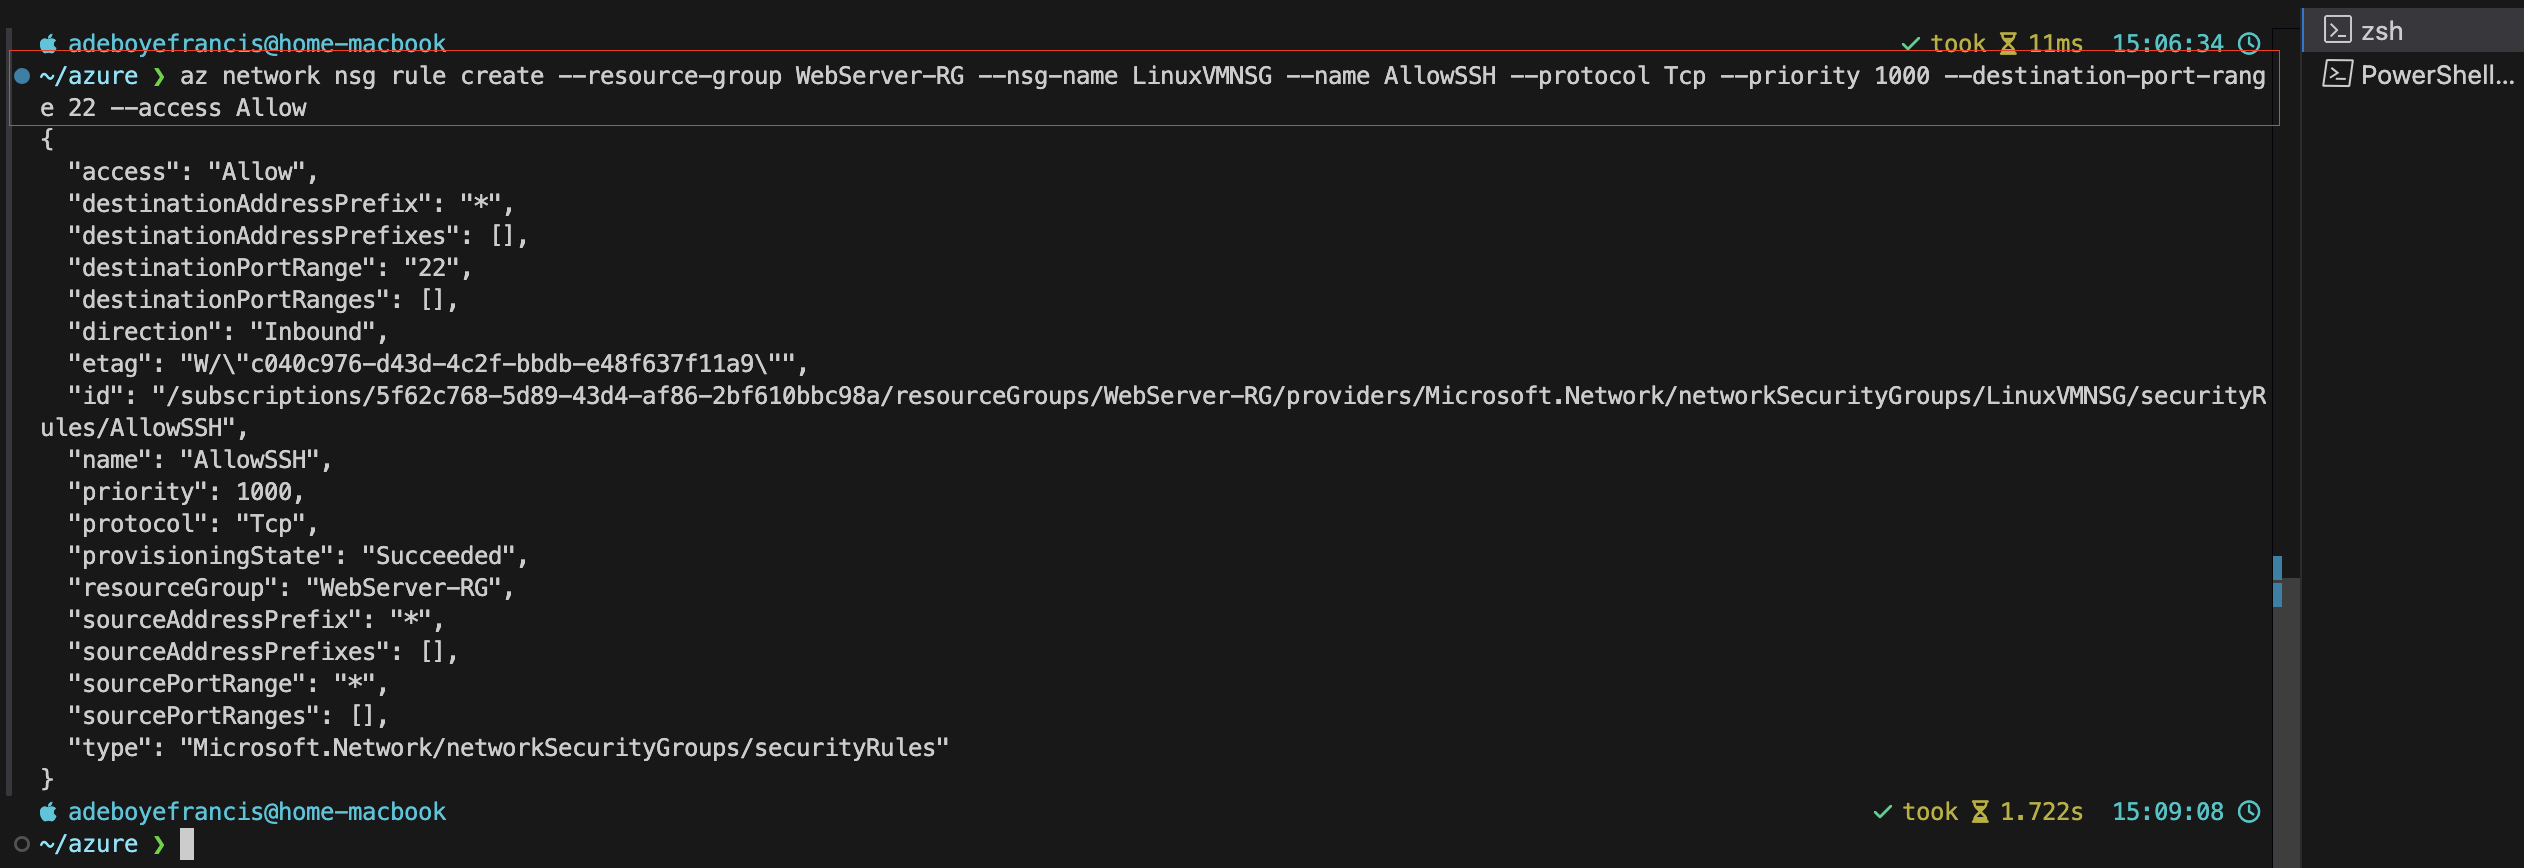
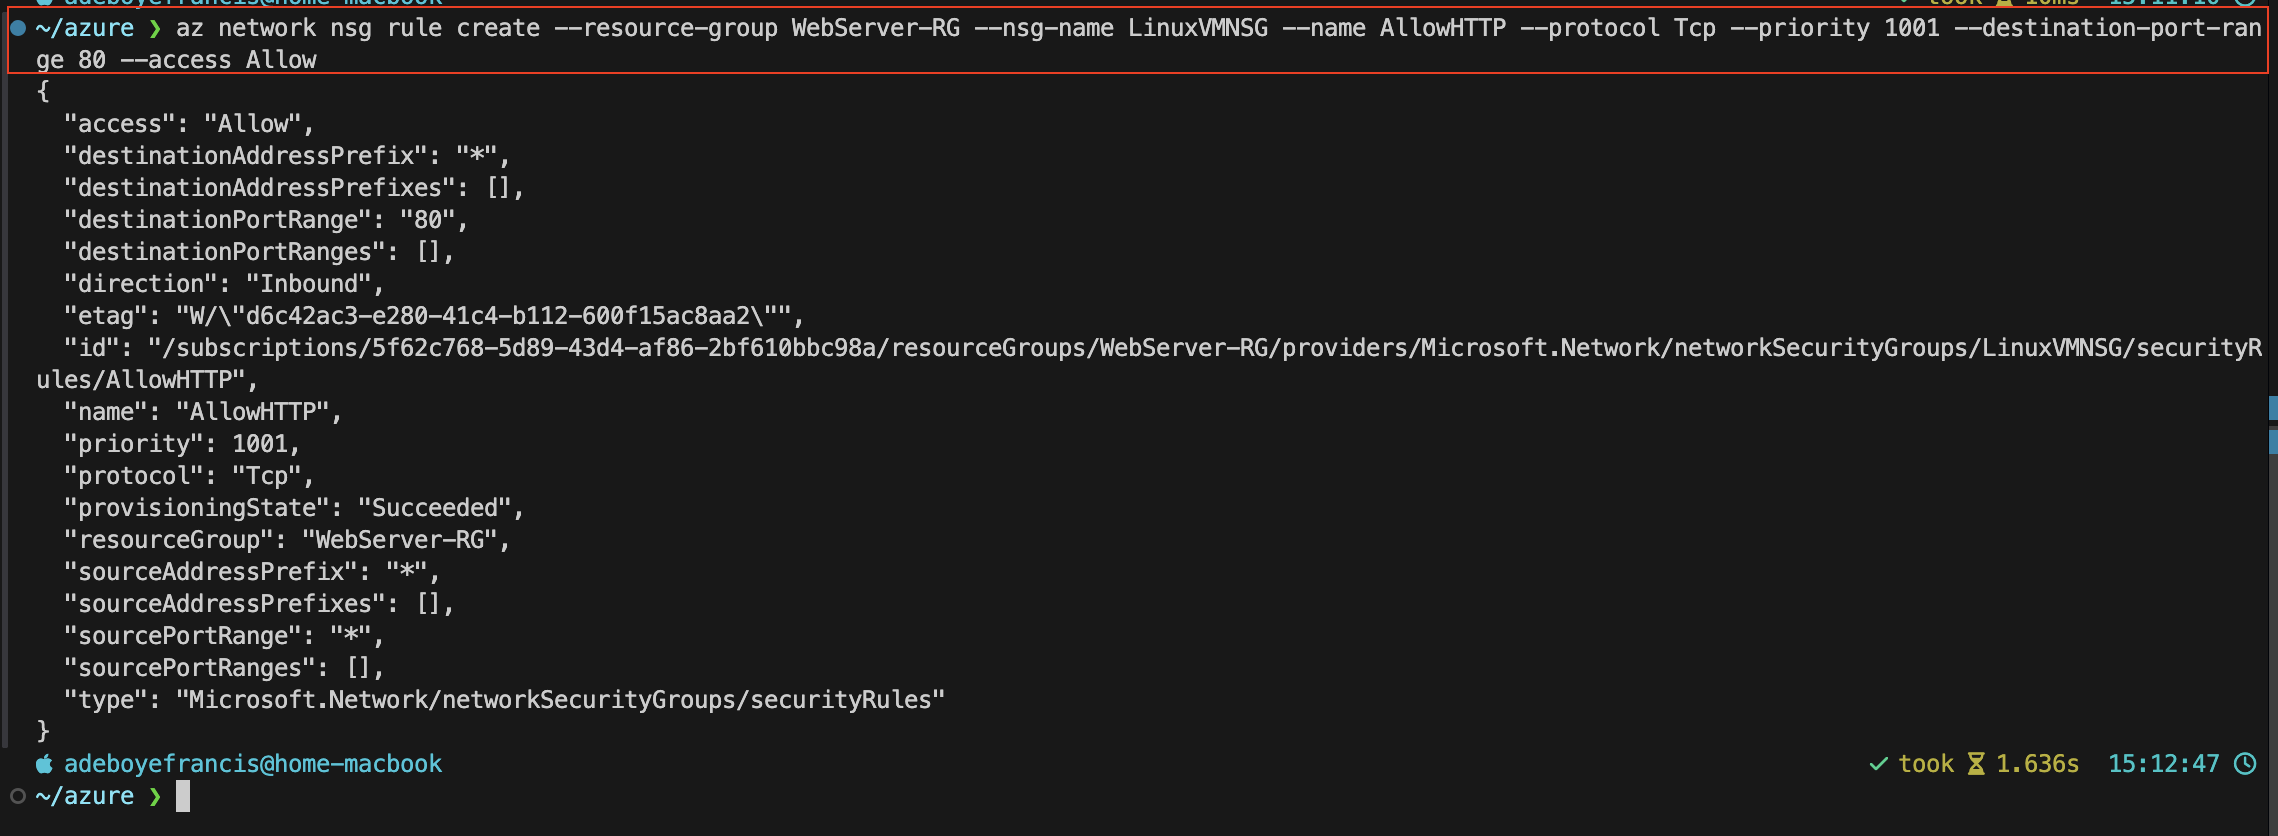
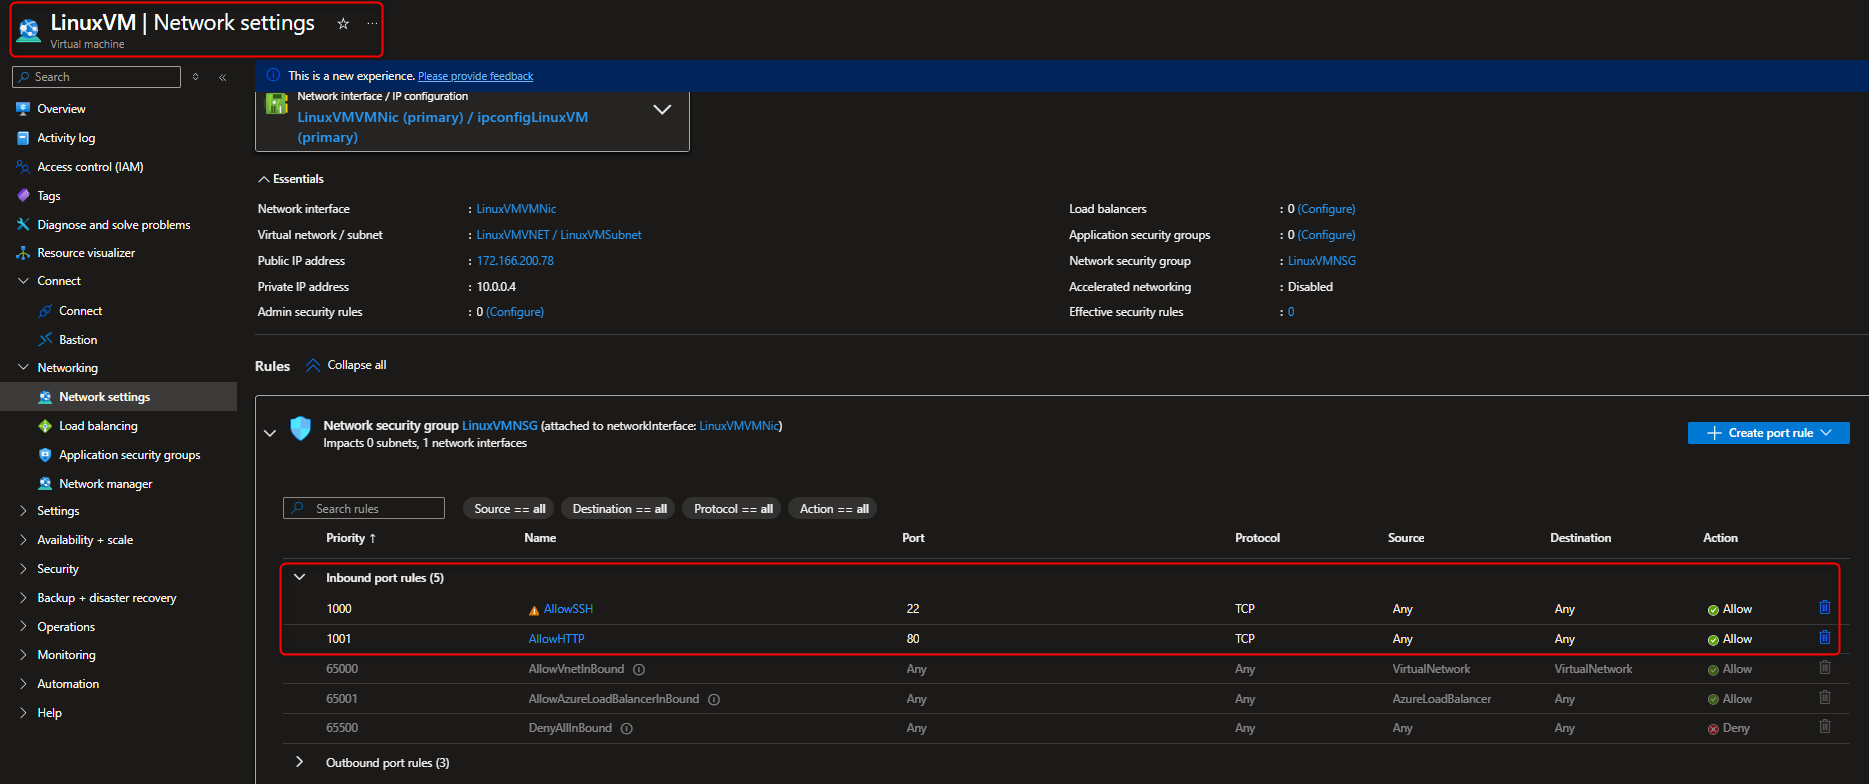
Create NSG to allow Inbound Traffic on Port 22(SSH) & Port 80(HTTP)
|
|
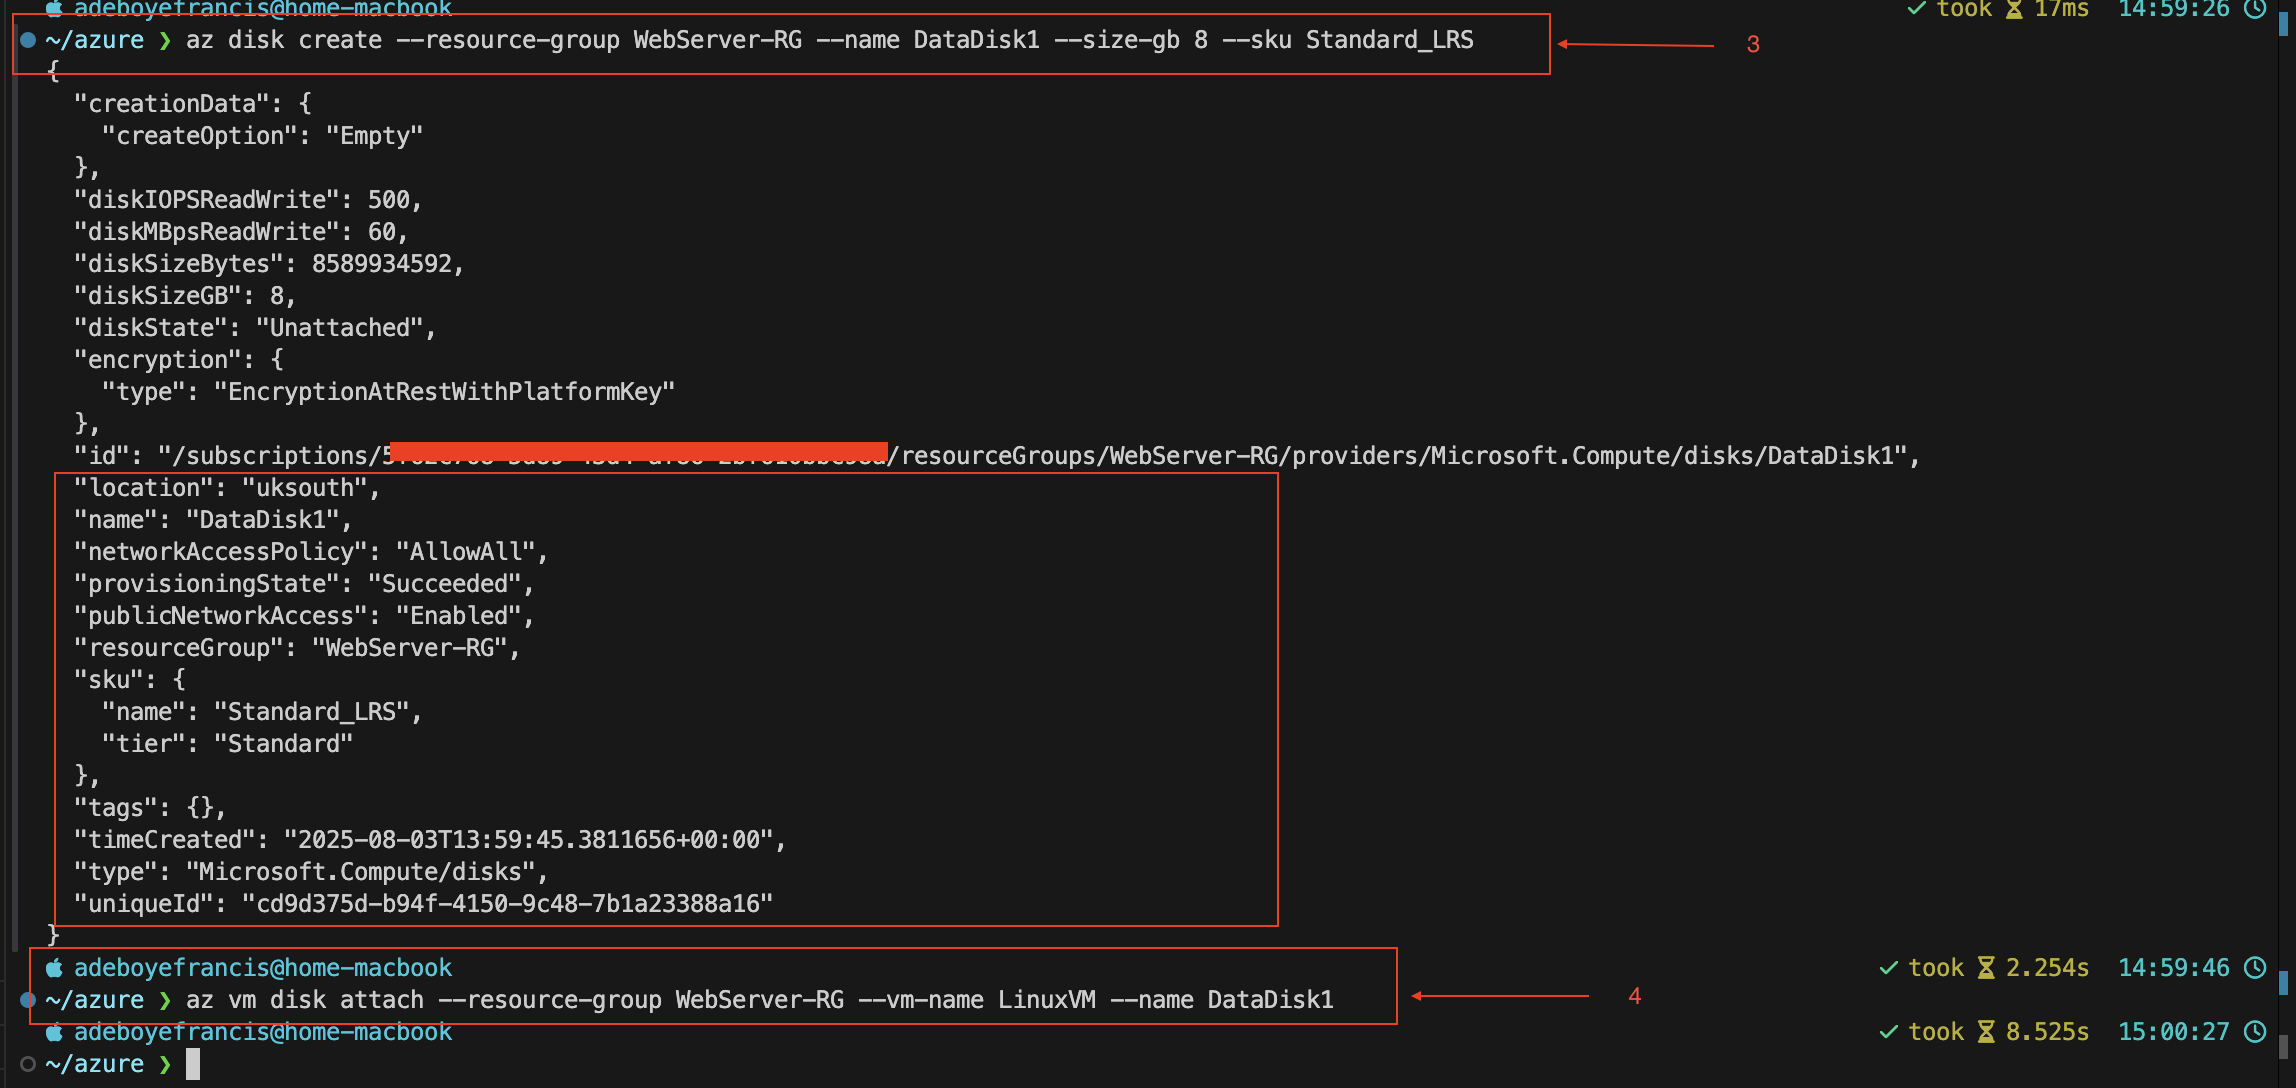
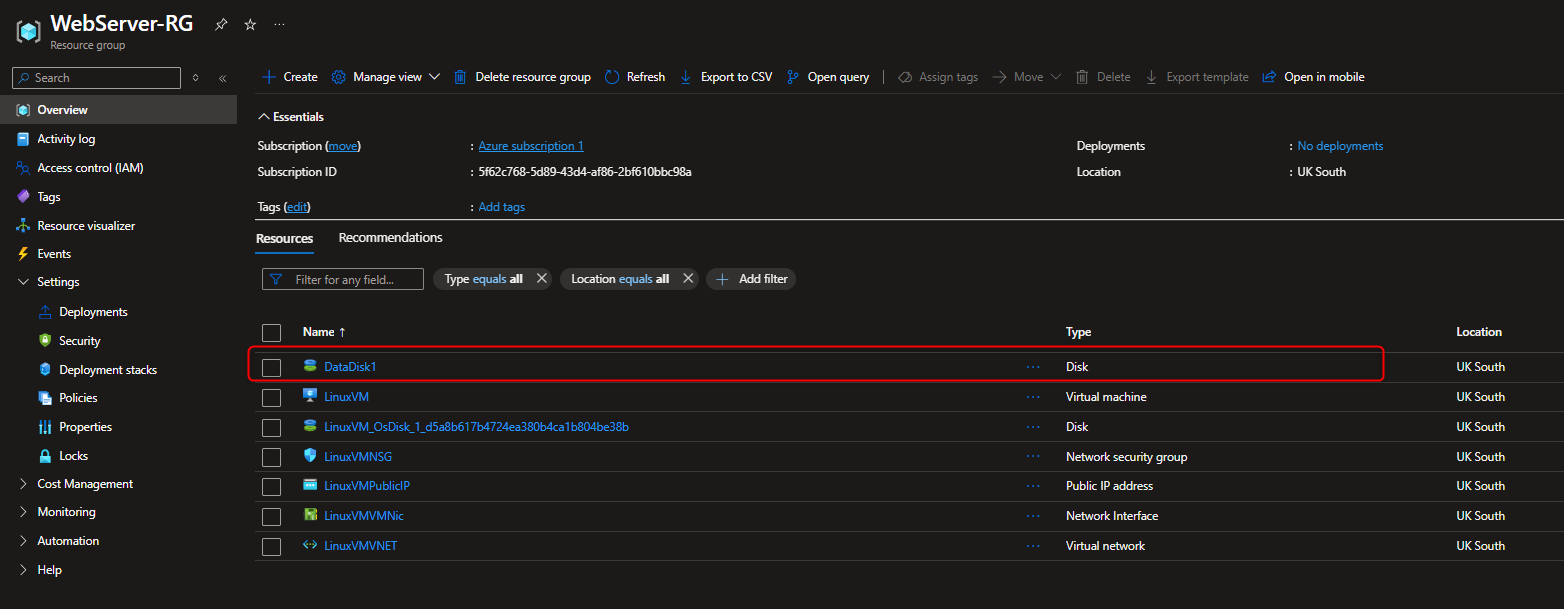
Create Data Disk & Associate New Disk to VM
|
|
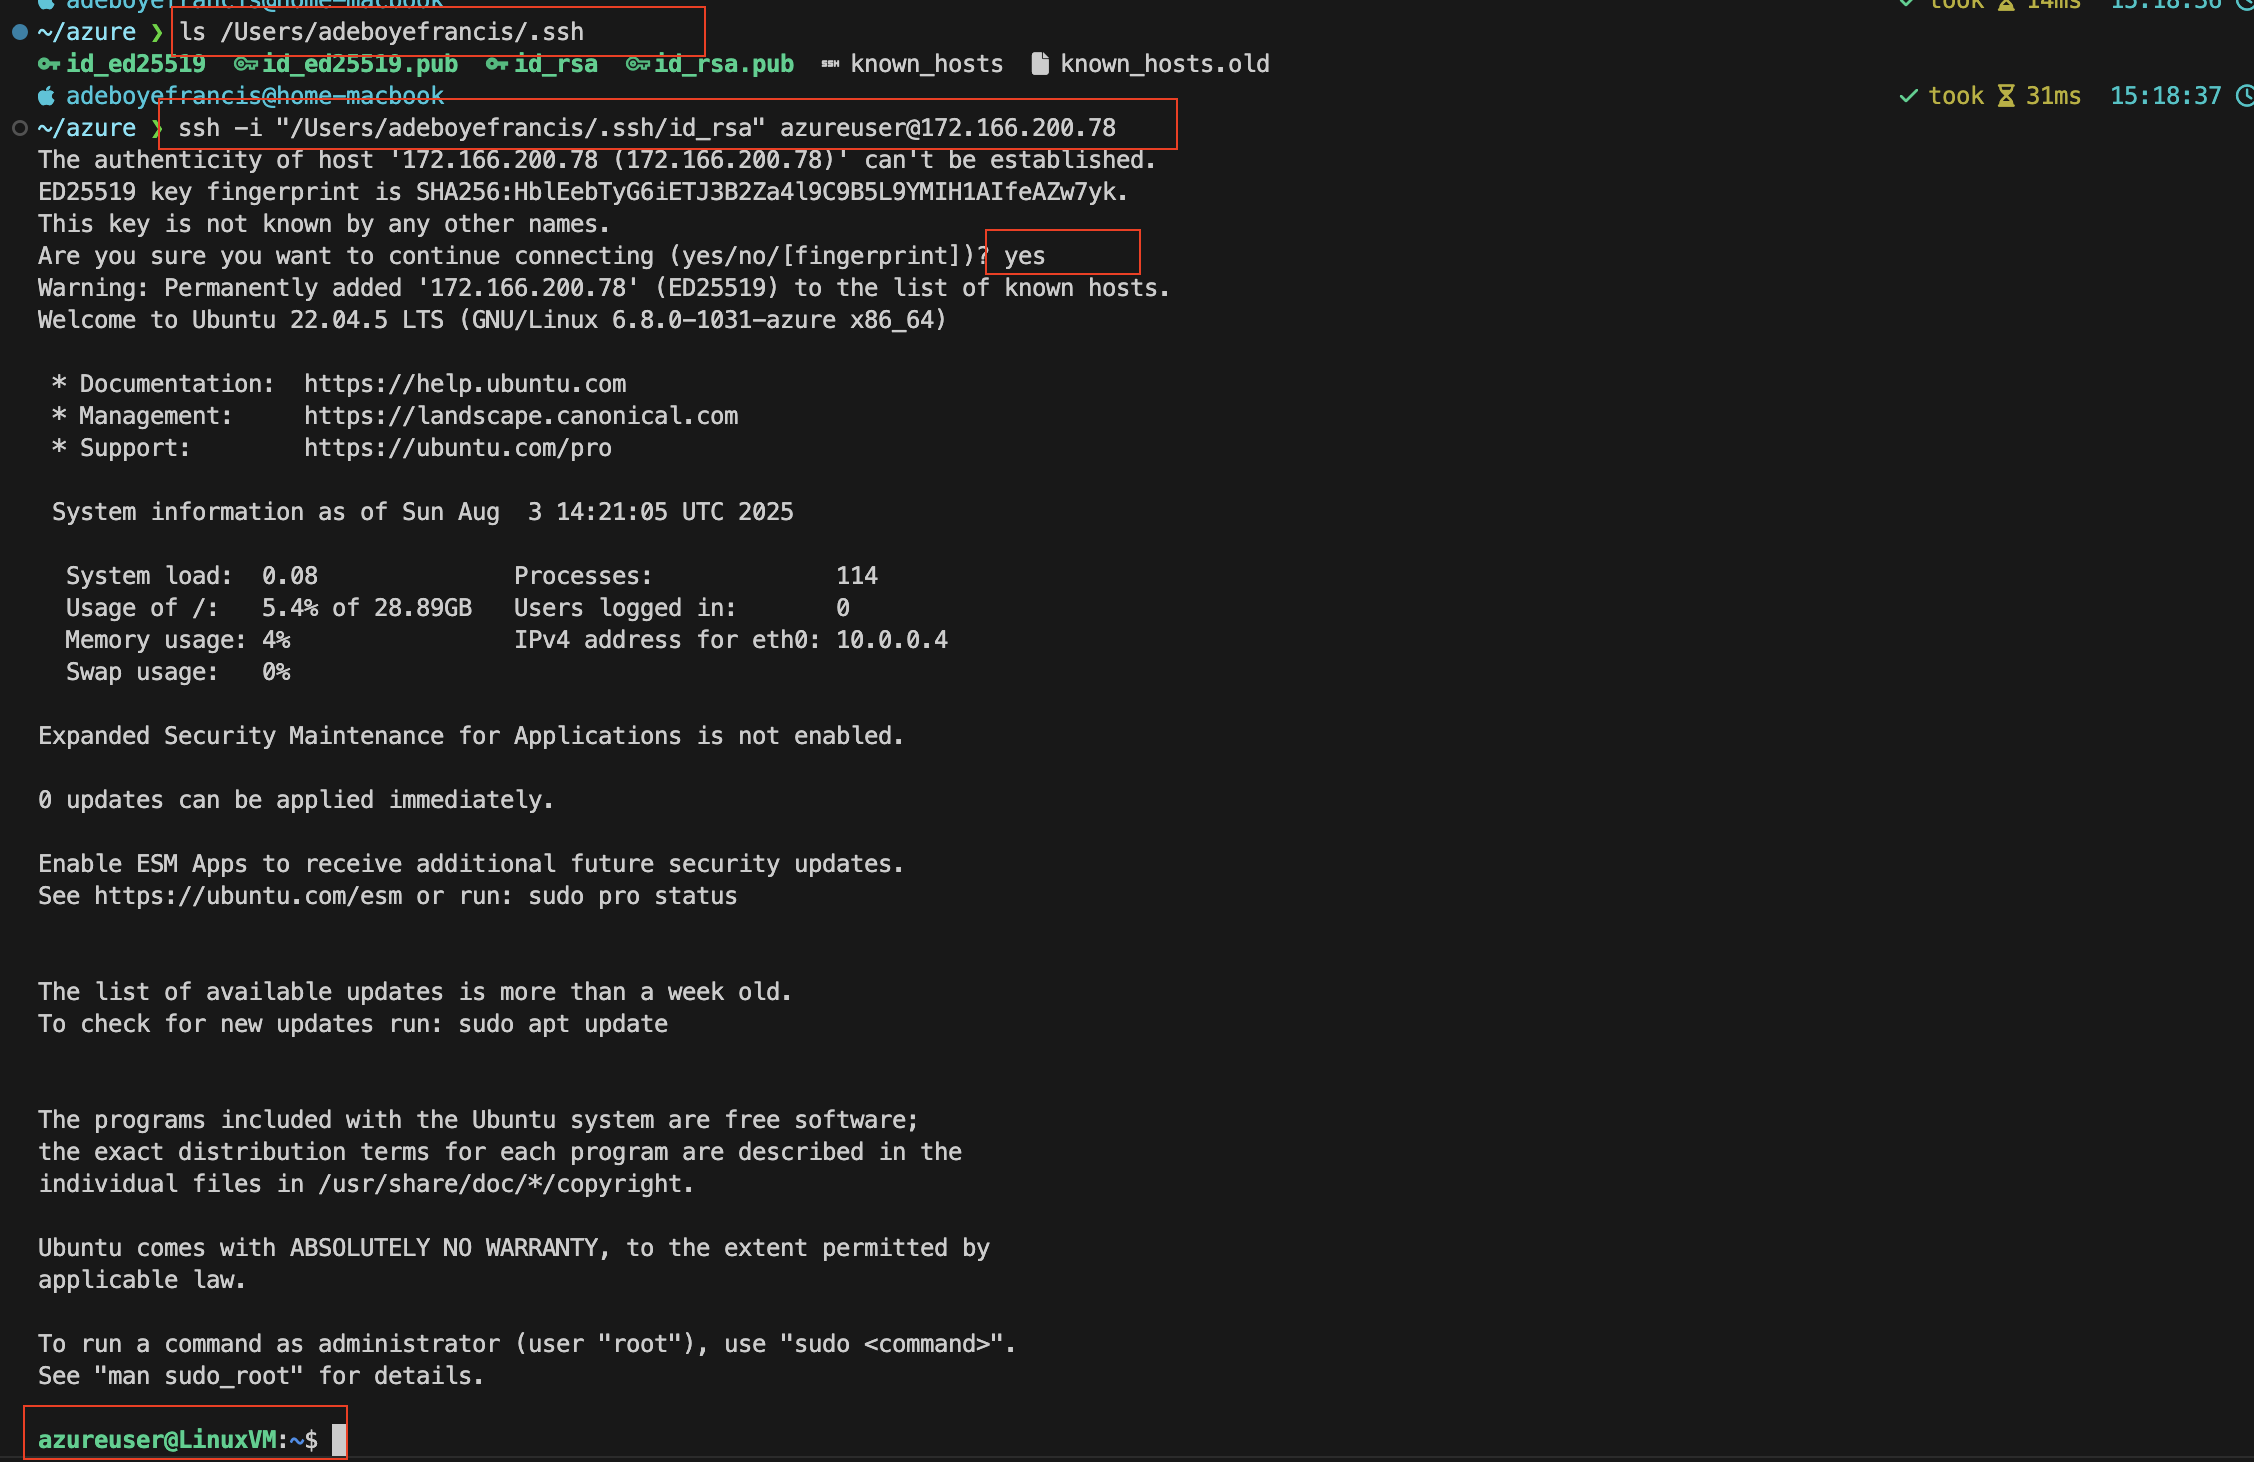
Connect to VM via Secure Shell (SSH)
- Navigate to the Path where the ssh key is kept, typically would be in
/.ssh
|
|
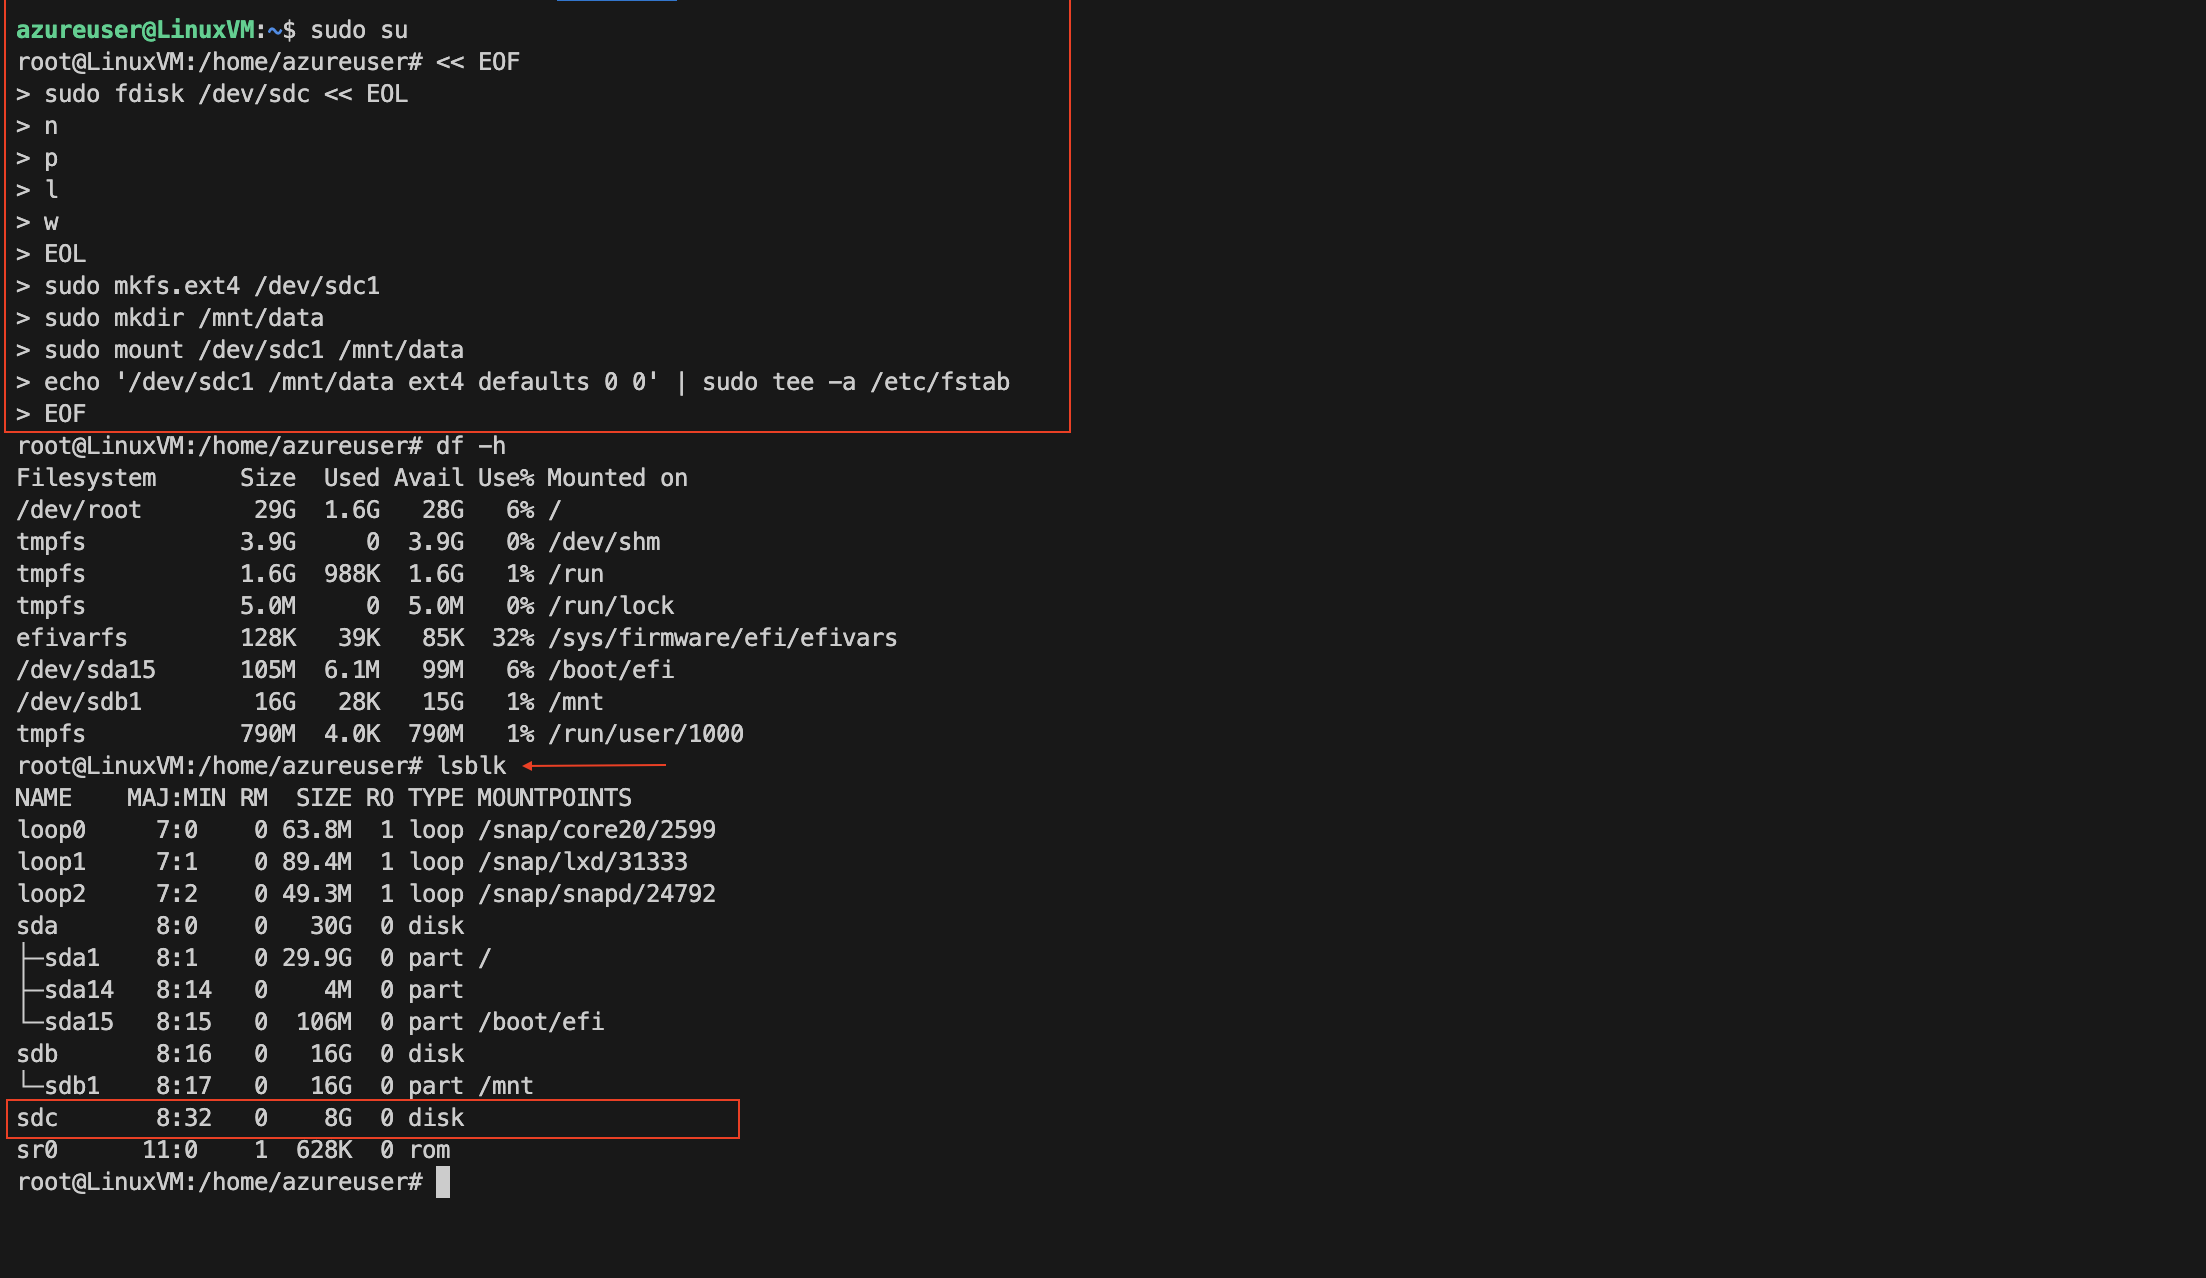
Mount Newly Created Data Disk on VM
|
|
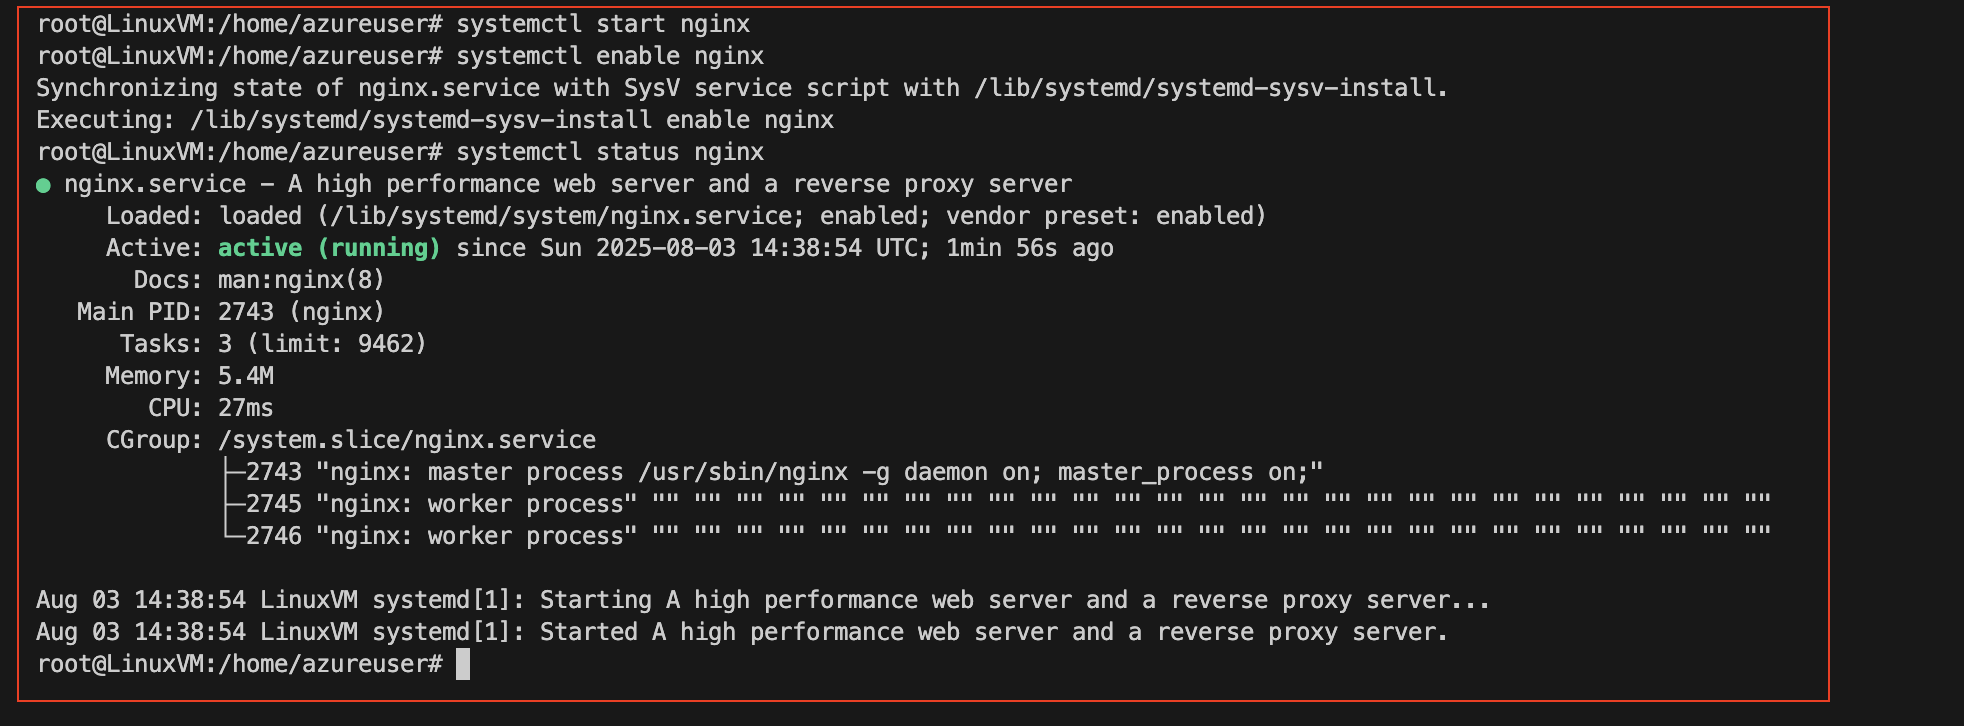
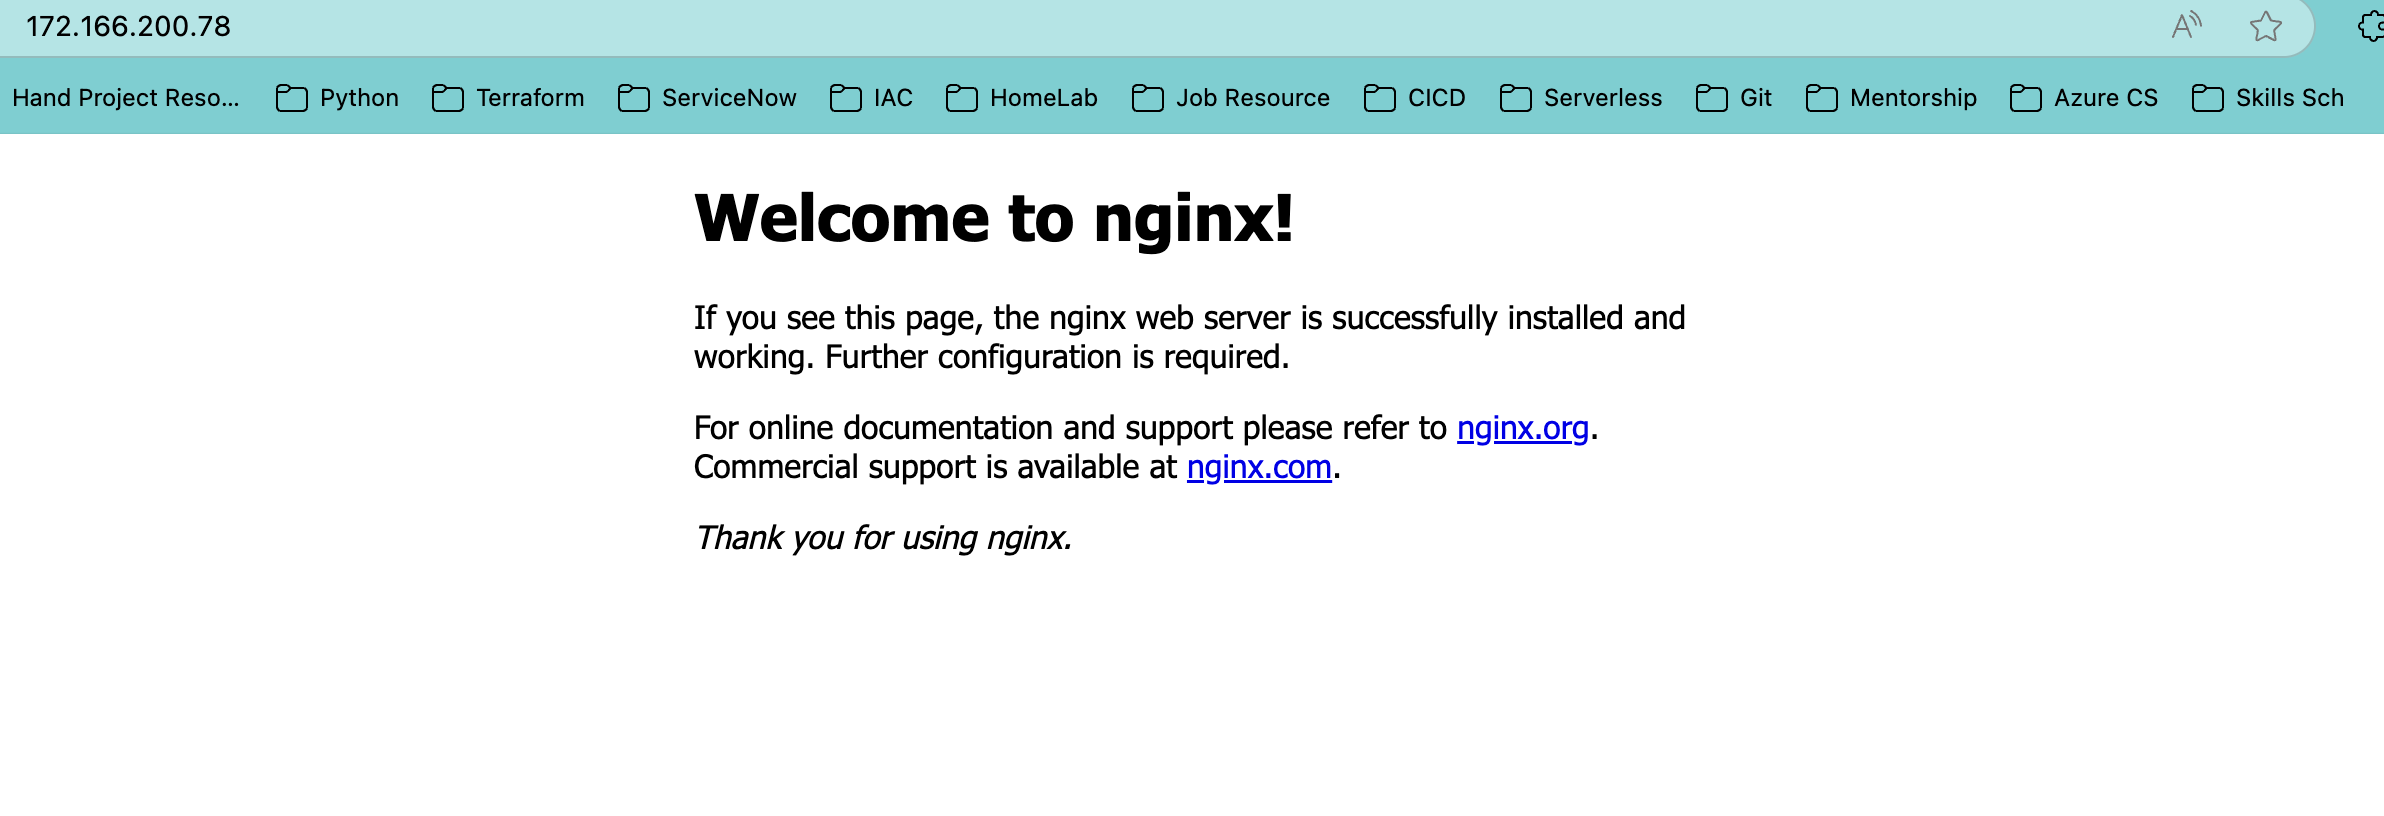
Install NGINX on Ubuntu Virtual Machine
|
|
Clean Up Resources
|
|
🧠 Final Thoughts
Provisioning web servers across different platforms in Azure isn’t just a technical exercise—it’s a blueprint for cloud fluency. By deploying IIS via the portal and NGINX via CLI, you’ve shown how flexible Azure can be for hybrid workflows, real-world scenarios, and secure architecture.
